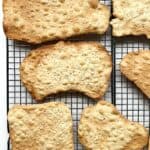
Homemade Matzo with Whole Grains
April 2024: Recipe updated to include flour weight, as well as volume, to help with more accurate flour measurement.Made with finely milled whole wheat pastry flour, enriched with a generous amount of olive oil, and garnished with flaky sea salt or a variety of other spices if that tickles your fancy, homemade matzo is a labour of love more than worth making once a year.
Servings: 12 small to medium sheets of matzo
Ingredients
- 280 gm whole wheat pastry flour (approximately 2 ¼ cups) *see note
- ½ teaspoon salt himalayan pink or sea salt
- ½ cup fresh water
- ⅓ cup extra virgin olive oil
- flaked sea salt for topping, optional
- optional add in flavourings: sesame seeds, nigella seeds, zaatar, poppy seeds or other seasonings of your choice
Instructions
- Preheat your oven to 500°F degrees. Position an oven rack in the lower third of your oven.
- Measure your flour using the spoon and sweep method. *see note below
- Get your kitchen set up for the matzo production process: you will need a food processor, two baking trays, a wire rack for cooling the matzo, a cutting board, a spatula, a tea towel, and kitchen gloves for handling the hot baking trays. If using a pasta roller, get your device set up and set to the thickest setting (usually setting #1), or have a rolling pin standing by.
- Make the dough: Add the flour and the salt to the food processor and pulse for a few seconds until combined. Turn the processor on low, and while it is running, add the water and oil in a thin and steady stream. Let the processor run until a dough ball starts to form on the blade. The dough should not be sticky or wet like a paste - if it is, add a tablespoon of flour and process again for a few seconds, repeating if necessary until a dough ball forms.
- Remove the dough ball onto a lightly floured surface such as a wooden cutting board, kneading briefly if required to incorporate any dough pieces or extra flour, then cut the dough into 12 pieces, by cutting the dough in half, and then half again, and then cutting each portion into thirds. Briefly roll the dough pieces into balls and set aside under a tea towel or in a lidded container so they don’t dry out.
- Roll out the dough: If using a rolling pin, roll a dough portion into a roughly oval shape, getting it as thin as possible, until almost see through, about ⅛th to 1/16th of an inch. If using a pasta roller, make sure your machine or device is set to the thickest setting (#1), press the dough balls flat using the palm of your hand and feed the dough through. Pass the dough through twice on each setting until you get to setting 4 by which point it should be super thin. By this point you will find the dough is rather fragile, so keep it upright with your fingers when you pass it through, otherwise it will drape over the sides and tear. If you wish, you can rotate the dough each time you pass it through to widen and shape the resulting sheet.
- Prepare the dough for baking: When each dough ball is rolled out, place it onto a baking tray, and fit up to 2 or 3 matzo sheets per tray if you have the space. Take a fork and prick the matzo sheets all over - I like to do so in two different directions to create an interesting pattern. Lightly sprinkle flaked sea salt over the surface of each sheet if desired.
- If making flavoured matzo: Roll out the dough so that it is slightly flattened, then sprinkle your desired flavouring over the surface. Fold the dough in half, roll out slightly and sprinkle seasonings on again, then form into a dough ball, proceeding to roll the dough out as noted above. Flavour each dough ball individually as desired.
- Bake the matzo: Consider doing one matzo sheet only in your first batch so that you can gauge your exact cooking time depending on the thickness of your dough. Put your first batch into the oven for 5 minutes, setting a timer; however, check your first batch at the 4 minute mark, and then again every 15-30 seconds until you achieve your desired doneness. The matzo should be lightly browned and speckled with some sections a little bit darker and some a bit lighter. Note how long your exact baking time was and bake up the remainder of your matzo using that timing, still keeping an eye on things as you get closer to your finished baking time as every batch can vary slightly.
- Once you pull out your cooked matzo, use a spatula to put it on a rack to cool - it will still be a little fragile until totally cooled so be gentle. Set your hot baking tray aside to cool down between batches, and use your second tray to make your next batch. Continue on in this manner until all of your dough is rolled, prepared, baked, and cooled!
- Storing your matzo: Once completely cooled, keep the matzo in any kind of airtight container that it will fit into - a closed cookie tin also keeps the matzo fresh - it will stay fresh and crisp for a at least 24 hours, so that you can make the matzo the day before you want to eat it. Enjoy!
Notes
Adapted from Melissa Clark’s Recipe for Easy Matzo.
To properly measure flour, lightly spoon it into your measuring cup. Without packing or pushing down the flour, use a straight-edged spatula or knife to level the flour until it’s even with the top of the measuring cup.