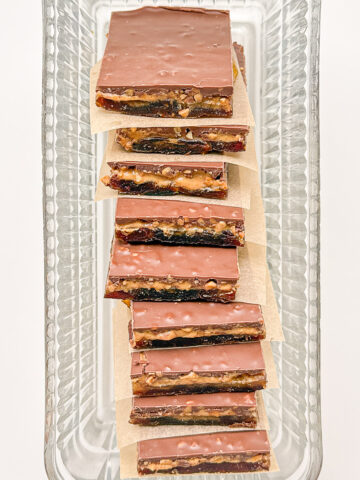
If you’ve ever wanted to swan around the house and eat bonbons, or if you simply adore the union of rich dark chocolate and sweet succulent coconut, then these completely plant based, 4 ingredient Chocolate Coconut Bonbons are for you!
Made in about half an hour using completely plant-based ingredients, with optional toppings just for the delight of it, these homemade “Bounty” bar style bites could theoretically be made for holiday or anytime gifting. However, you may just end up enjoying them at home instead; I won’t tell anyone if you don’t!
Jump to:
Chocolate loves coconut
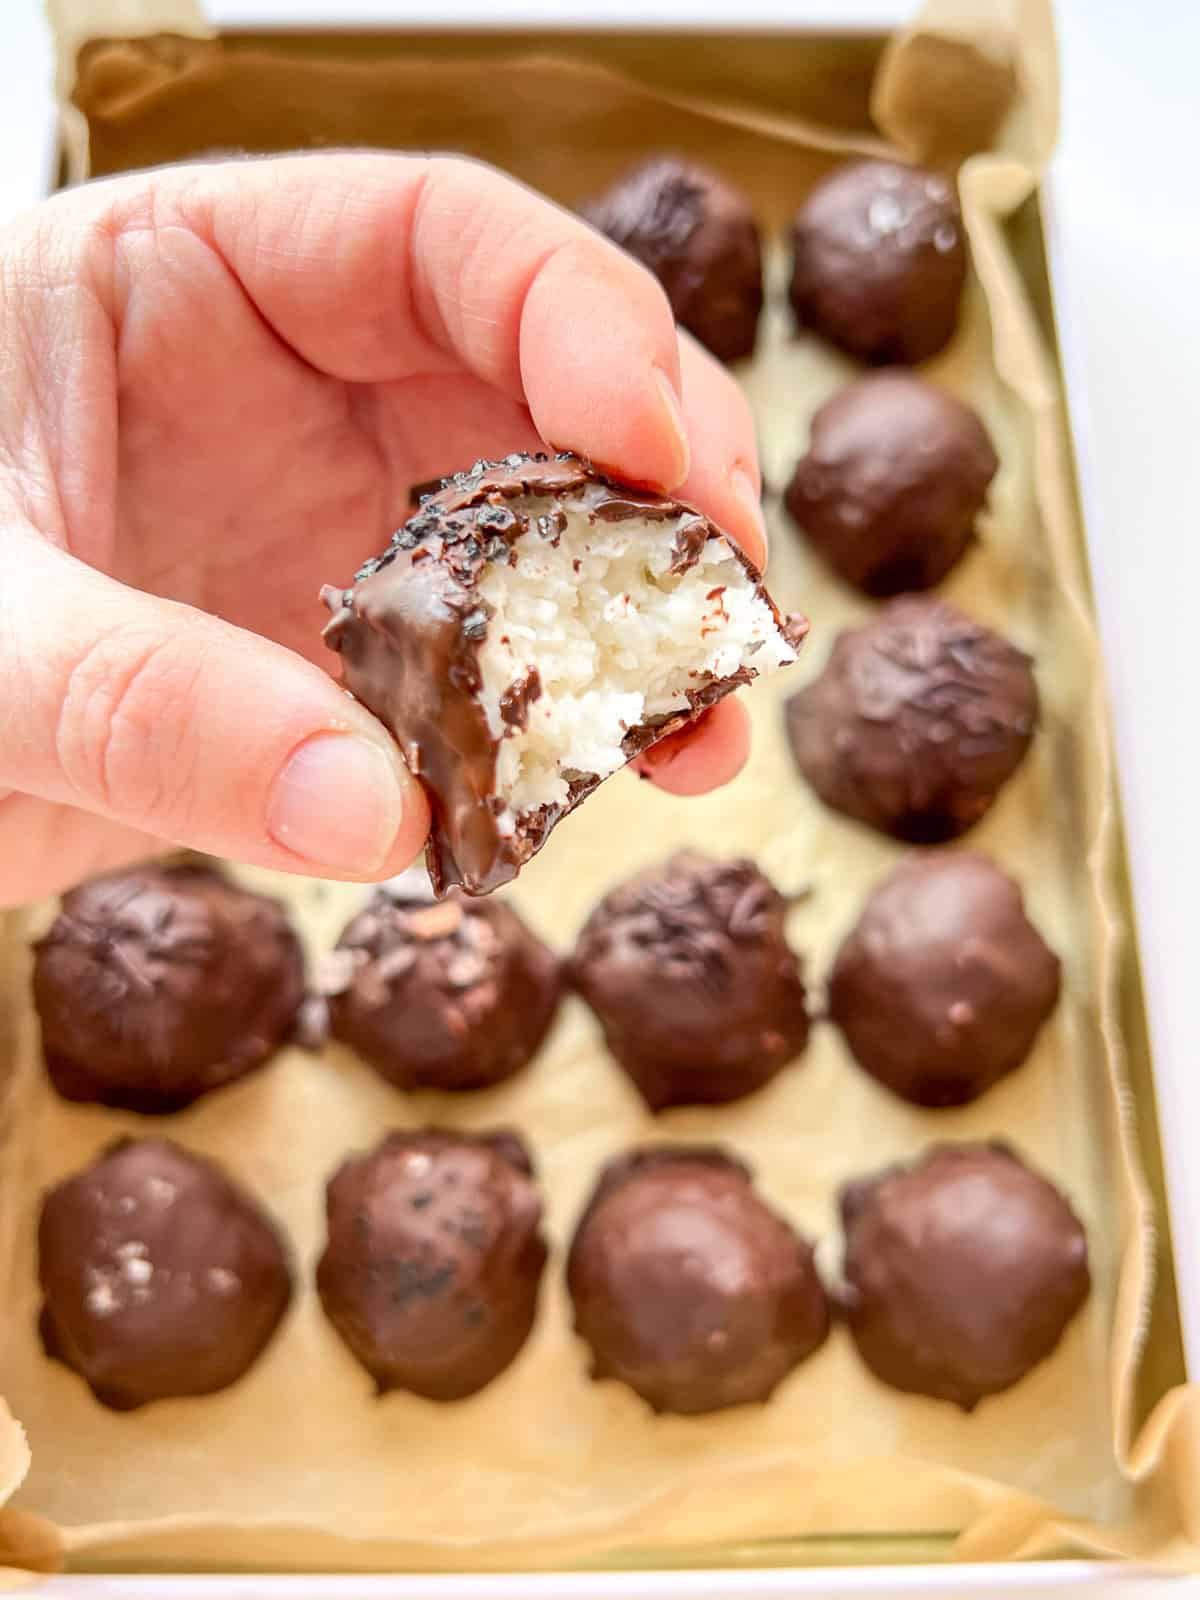
Inspired by a temporary local shortage of Bounty bars - a treat a former coworker and I occasionally exchanged to lift each other’s spirits up - this two-bite homemade version surpasses the original, if I do say so myself. Here, unsweetened and shredded coconut is combined with non-dairy condensed coconut milk, scooped into 1 tablespoon balls and left to firm up in the freezer. Meanwhile, dark chocolate, augmented by a touch of coconut oil for added shine, is melted using a bain-marie, ready to enrobe the luscious coconut centers with their chocolate coating.
The Food Find
I have often spied Condensed Coconut Milk at various local health food stores, making a mental note to use it. Now that I have become familiar with this vegan alternative to condensed milk, it is a mainstay in my pantry. Rich, mildly coconutty, and most often made with two simple ingredients condensed coconut milk is a must have for any plant forward kitchen where sweets and baked goods are prepared. Find out more about Condensed Coconut Milk.
Using a bain-marie
This French culinary term refers to the process of heating items using a water bath, also known as using a double boiler. In using this process to melt chocolate, a small glass bowl is settled on top of a pot containing just simmering water, allowing the chocolate to gently melt without the fear of scorching over direct heat. While some kitchens may have a dedicated bain-marie or double boiler set up, I always improvise one, making sure that my bowl is heat proof and fits the mouth of my pot entirely, with enough room to sit over the water below.
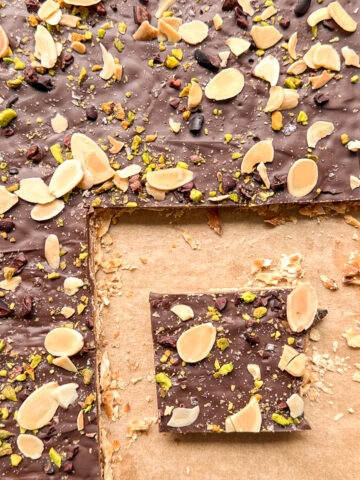
Customizable toppings of your choice
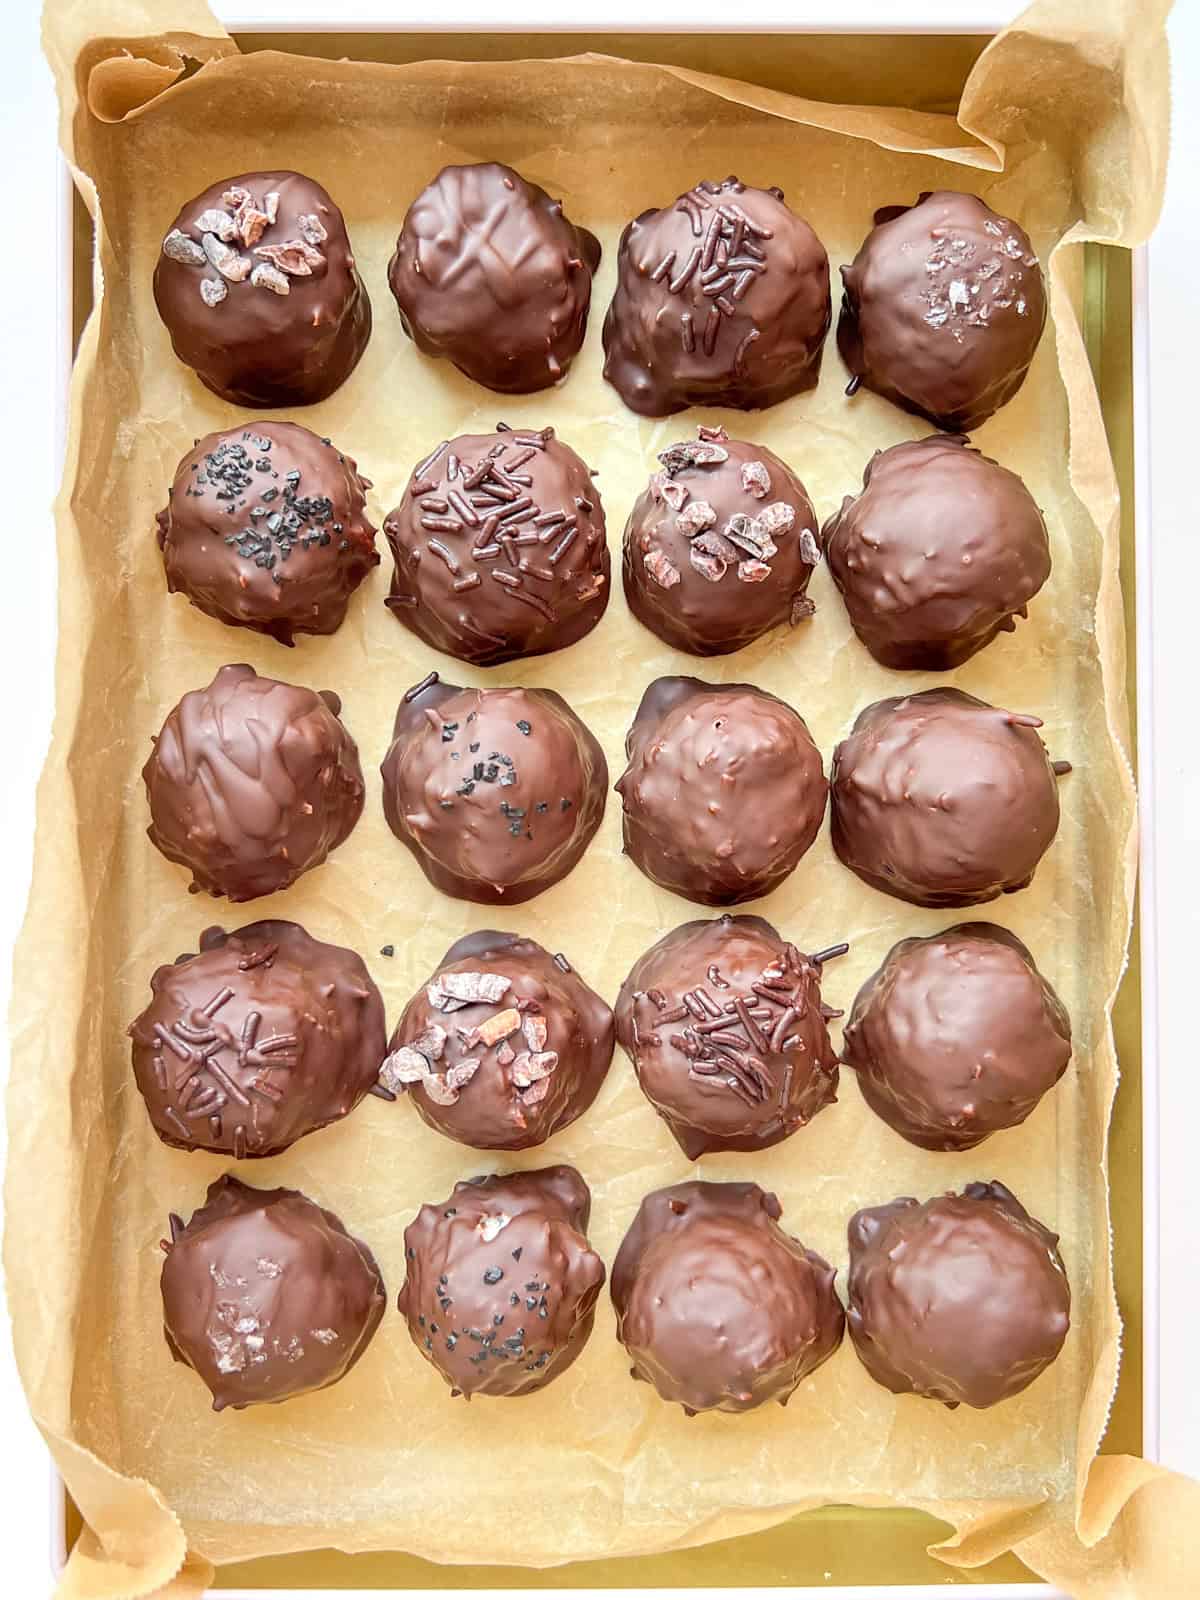
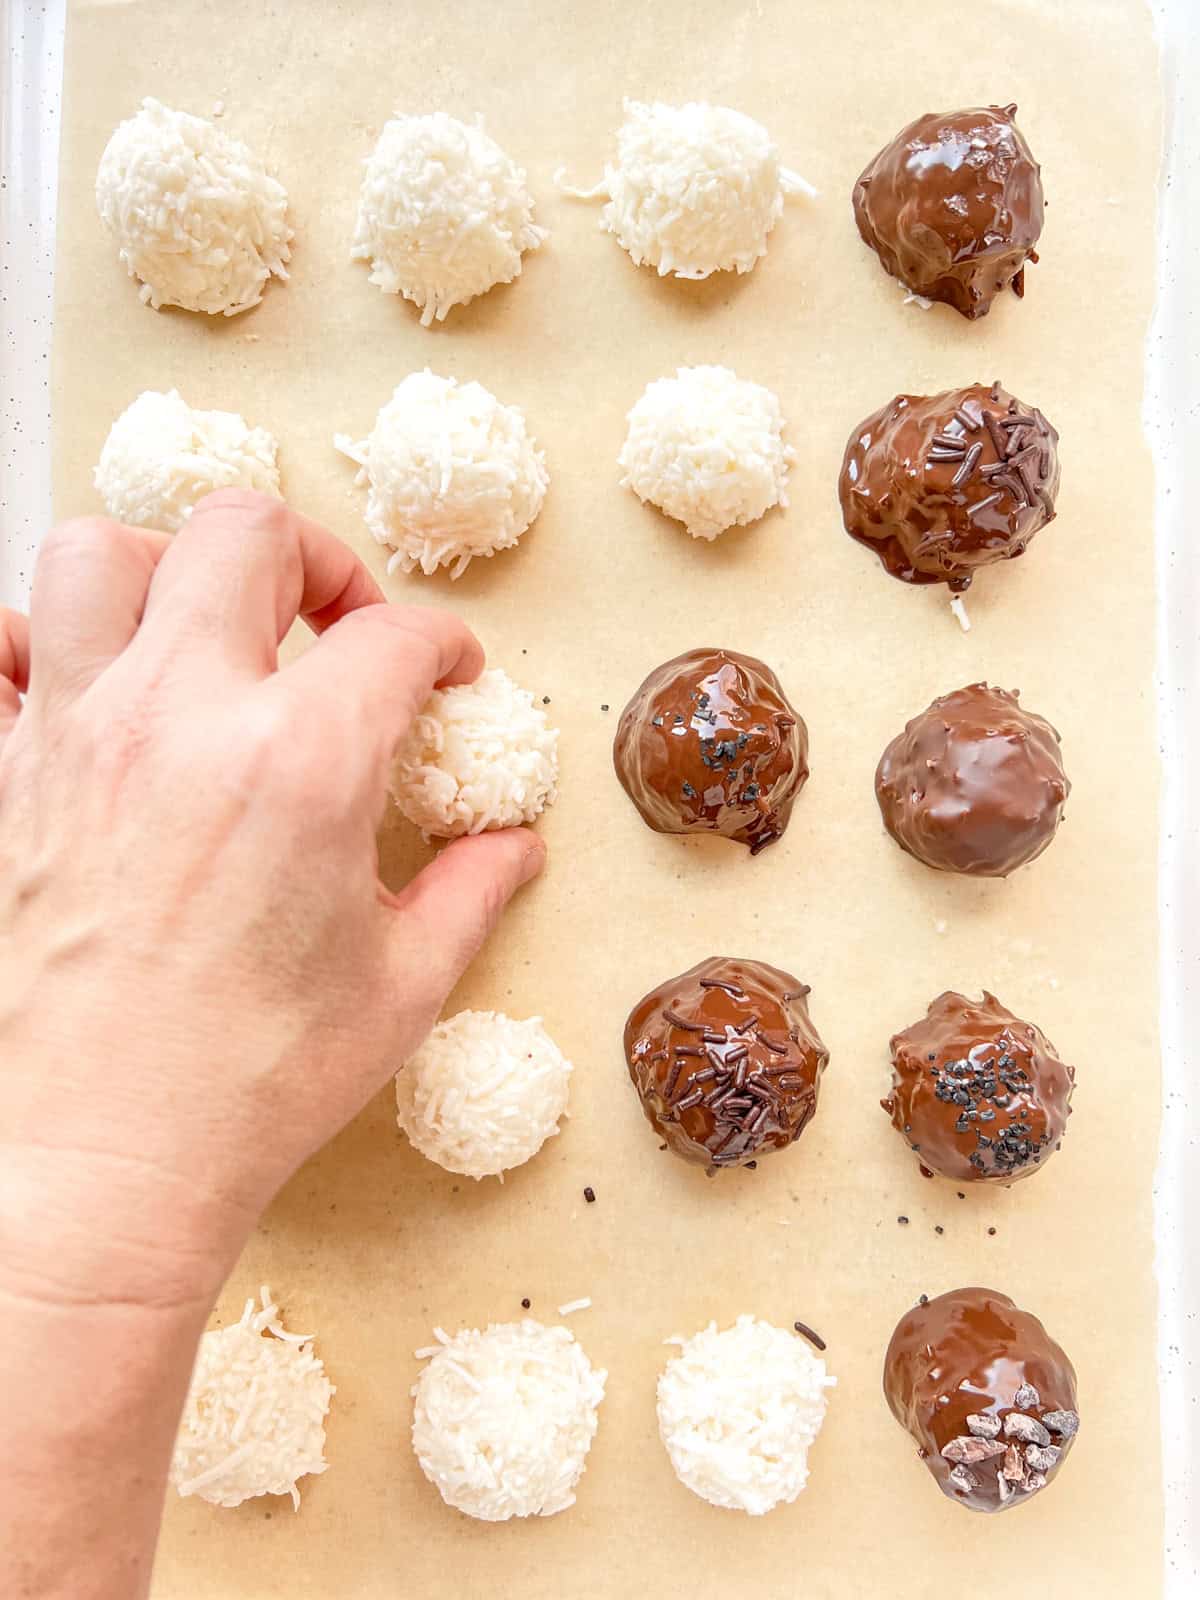
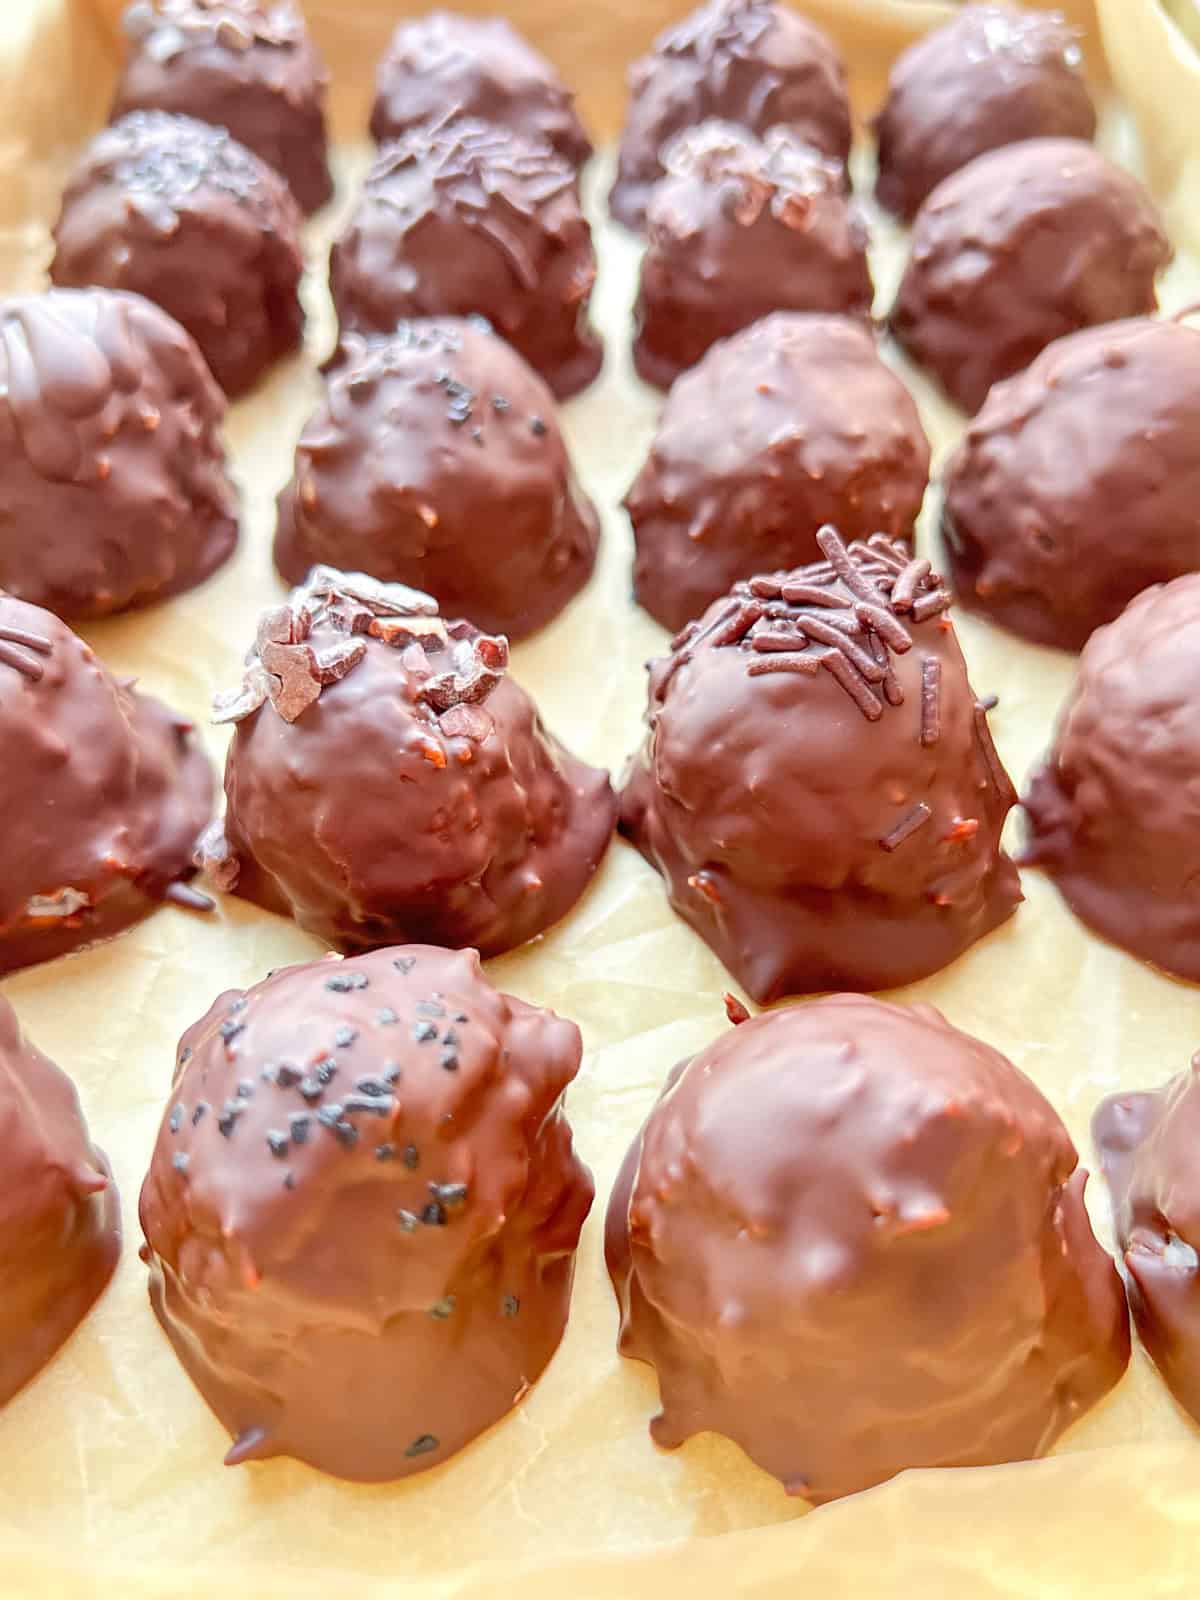
Lest you not find the pairing of chocolate and coconut alluring enough, I invite you to delight, as I do, in adding various sprinkled toppings to the just dipped bonbons. I most often use a pinch of flaky sea salt, black sea salt, rich tasting dutch chocolate sprinkles, or crushed cacao nibs as toppings, as well as making sure to leave a few unadorned for their delicious simplicity. Other toppings for consideration could include shredded coconut, multicoloured sprinkles, dried flowers, crushed and toasted almonds, or even toasted sesame seeds; whatever tickles your fancy!
Tips for quick work
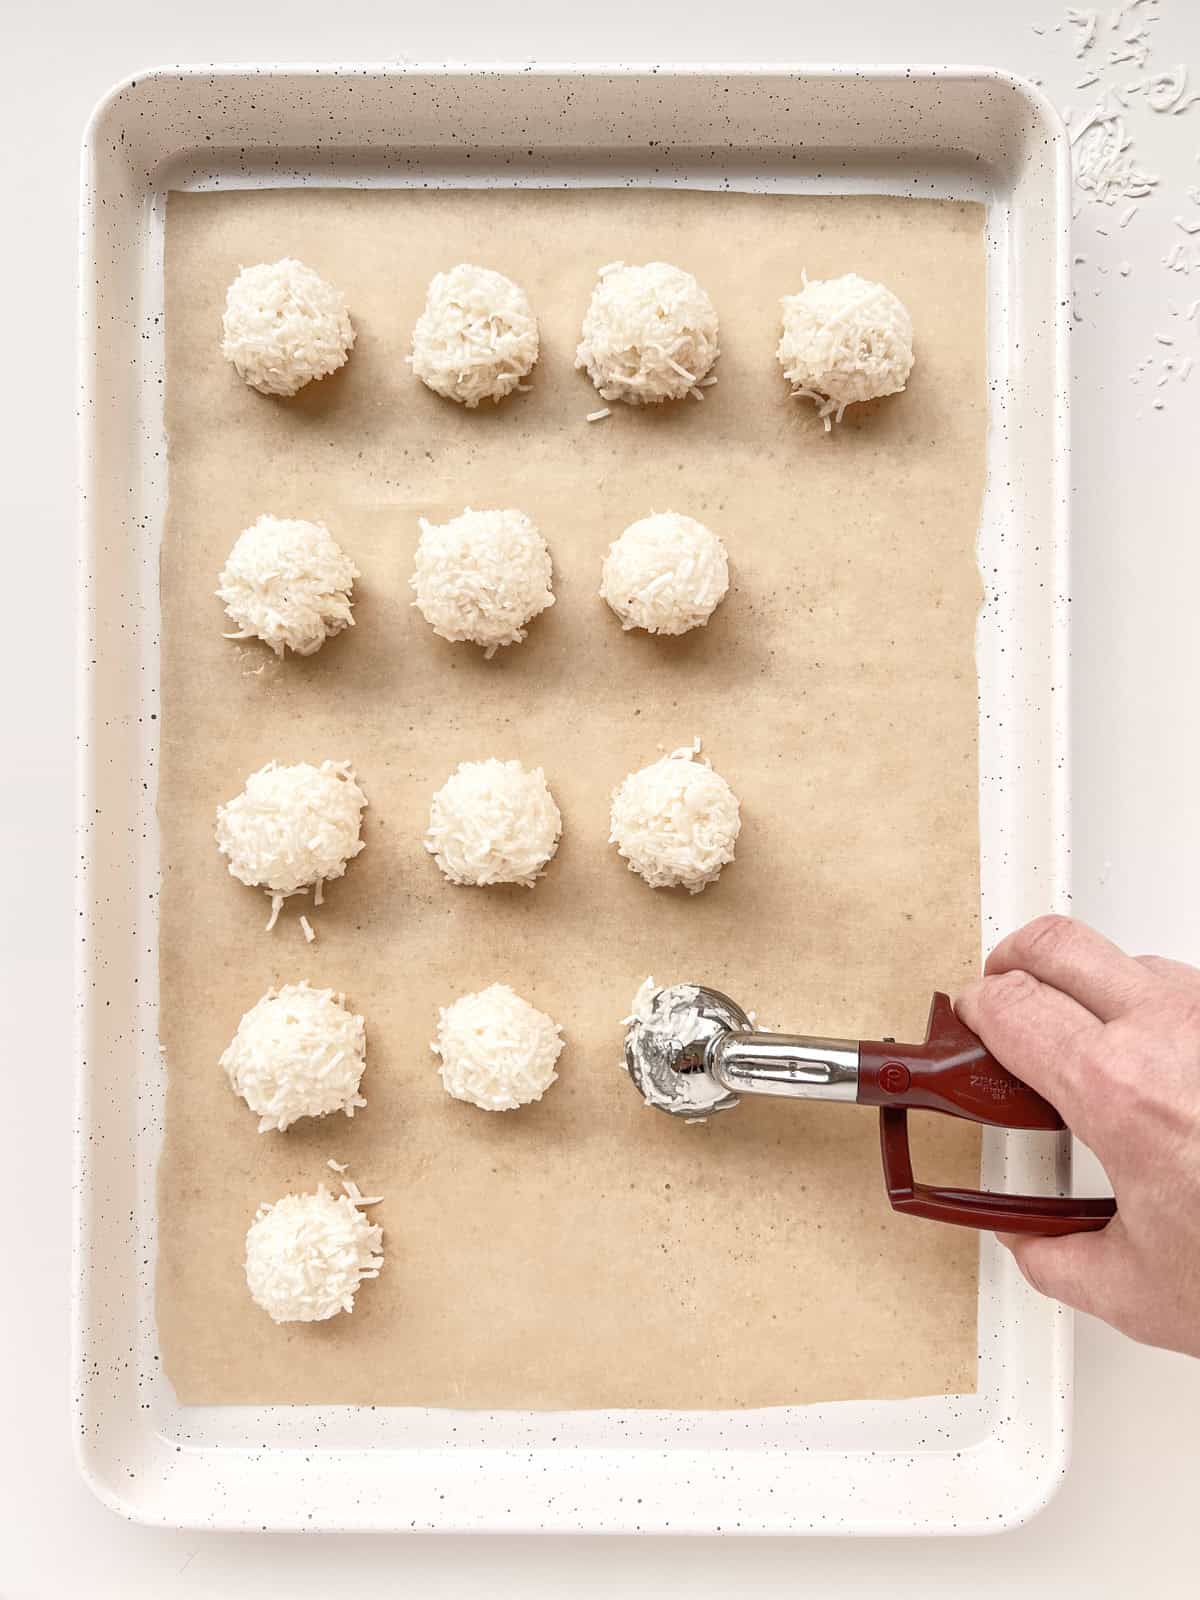
A few tips will help you make neat and quick work of making your bonbons. Firstly, when scooping out your coconut centres, lay them out on a baking sheet with enough room around them, so that once firmed up from their time in the freezer, you will have enough room to lift them up and return them to their spot once coated in chocolate.
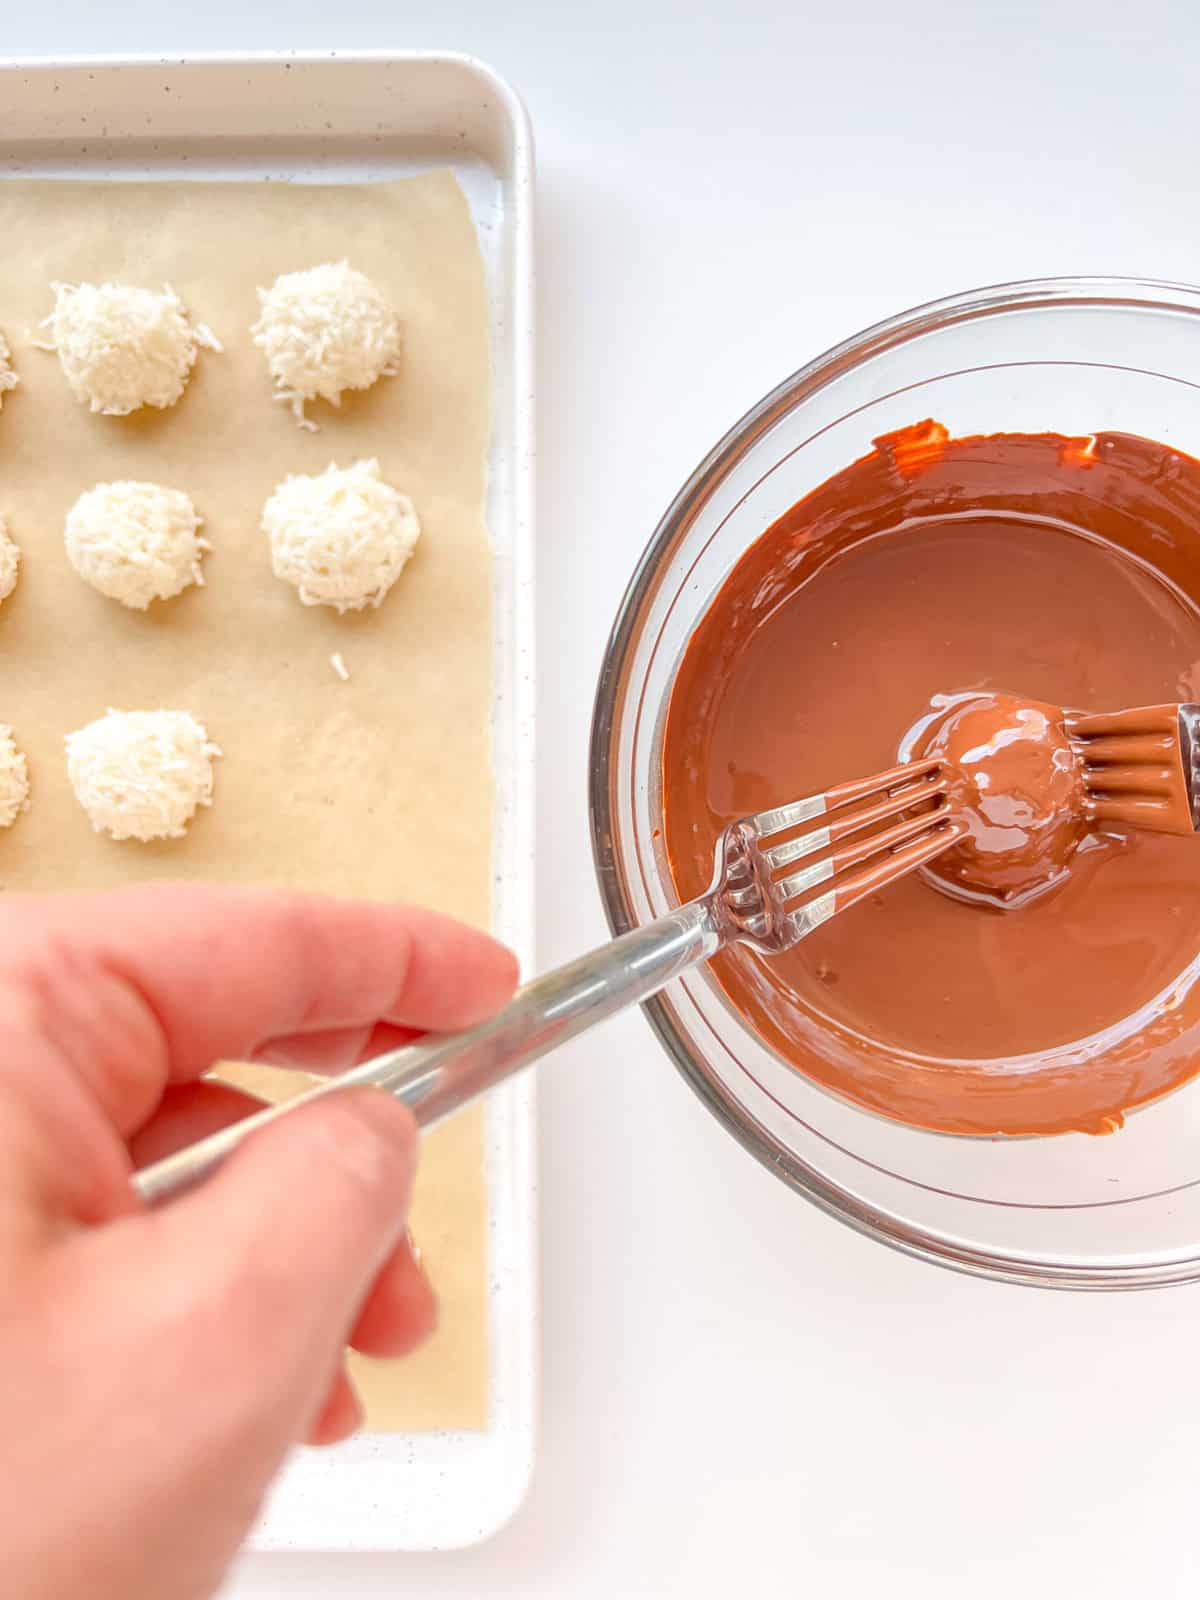
Set up your chocolate dipping and topping stations so that everything is within reach, making sure the melted chocolate is right next to your baking sheet. I use my hands to place a single coconut centre into the melted chocolate, and then I find using a pair of forks is the easiest method to turn the coconut centre around to make sure it is totally coated. Once fully coated, I use the forks to lift the coconut centre up, letting excess chocolate drip off for a few moments before replacing the bonbon onto the baking sheet.
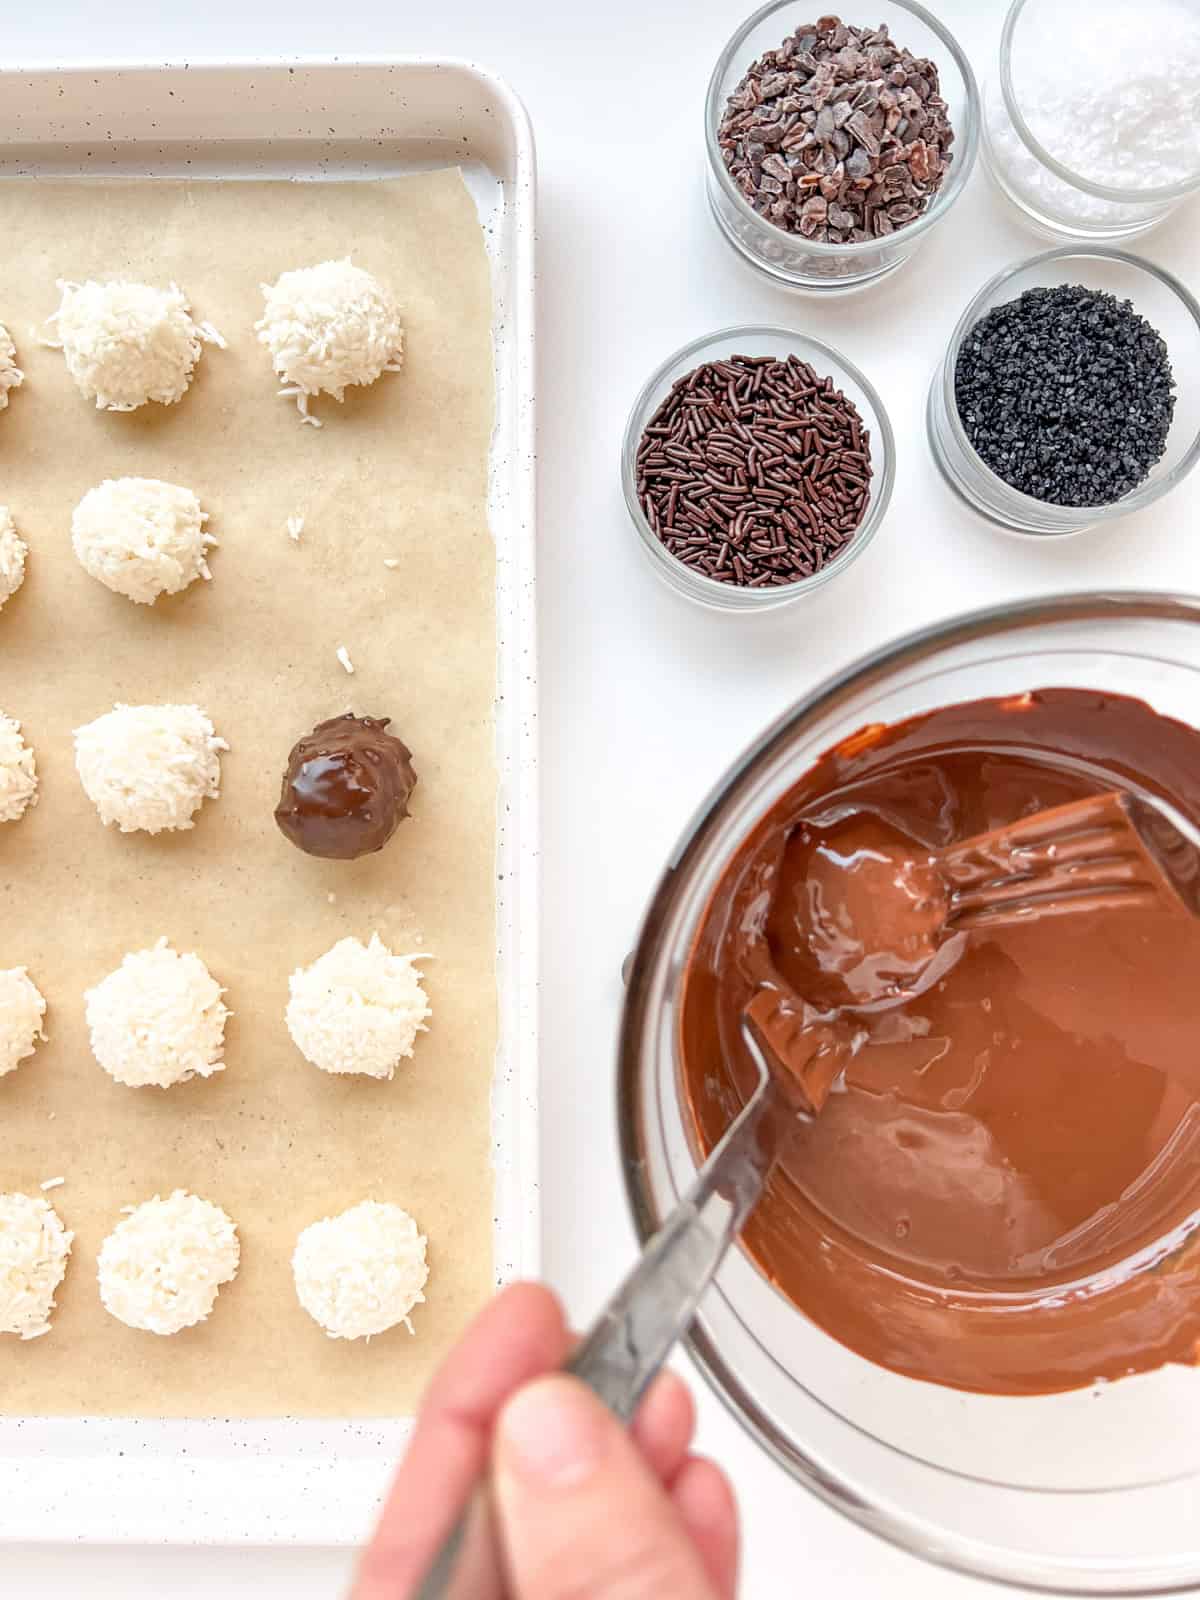
If you have the patience to further remove any excess chocolate at the base of the bonbon, you can also gently scrape the bottom of each bonbon across the edge of your bowl before moving it back to your sheet pan, but this is not essential.
The toppings need to be sprinkled on to the bonbons while the chocolate is still wet, so I may coat 2 or 3 bonbons in a row with chocolate, then pause and sprinkle toppings, and the continue on. If you have a kitchen helper, even better; have your sidekick sprinkle toppings for you, so you can focus on coating the bonbons, making quick work of the entire project.

Perfect for gifting
If I ever can bear to part with enough of these bonbons to give away, I gift them in a small tin lined with parchment paper. Or, I just leave that tin in the kitchen, think about gifting them, and then allow myself and my family to eat them until they are suddenly and astonishingly gone! I wonder how that happens?!
Storage
These bonbons can live on the counter for a few days in a metal tin but will soften over time. If you do keep them in the fridge, where they will last for quite a bit longer, try your best to let them return to room temperature before eating. Then again, they are still irresistible fridge cold, so really, do as you please!
Looking for other sweet treats?


Chocolate Coconut Bonbons (AKA Homemade "Bounty" Bites)
Ingredients
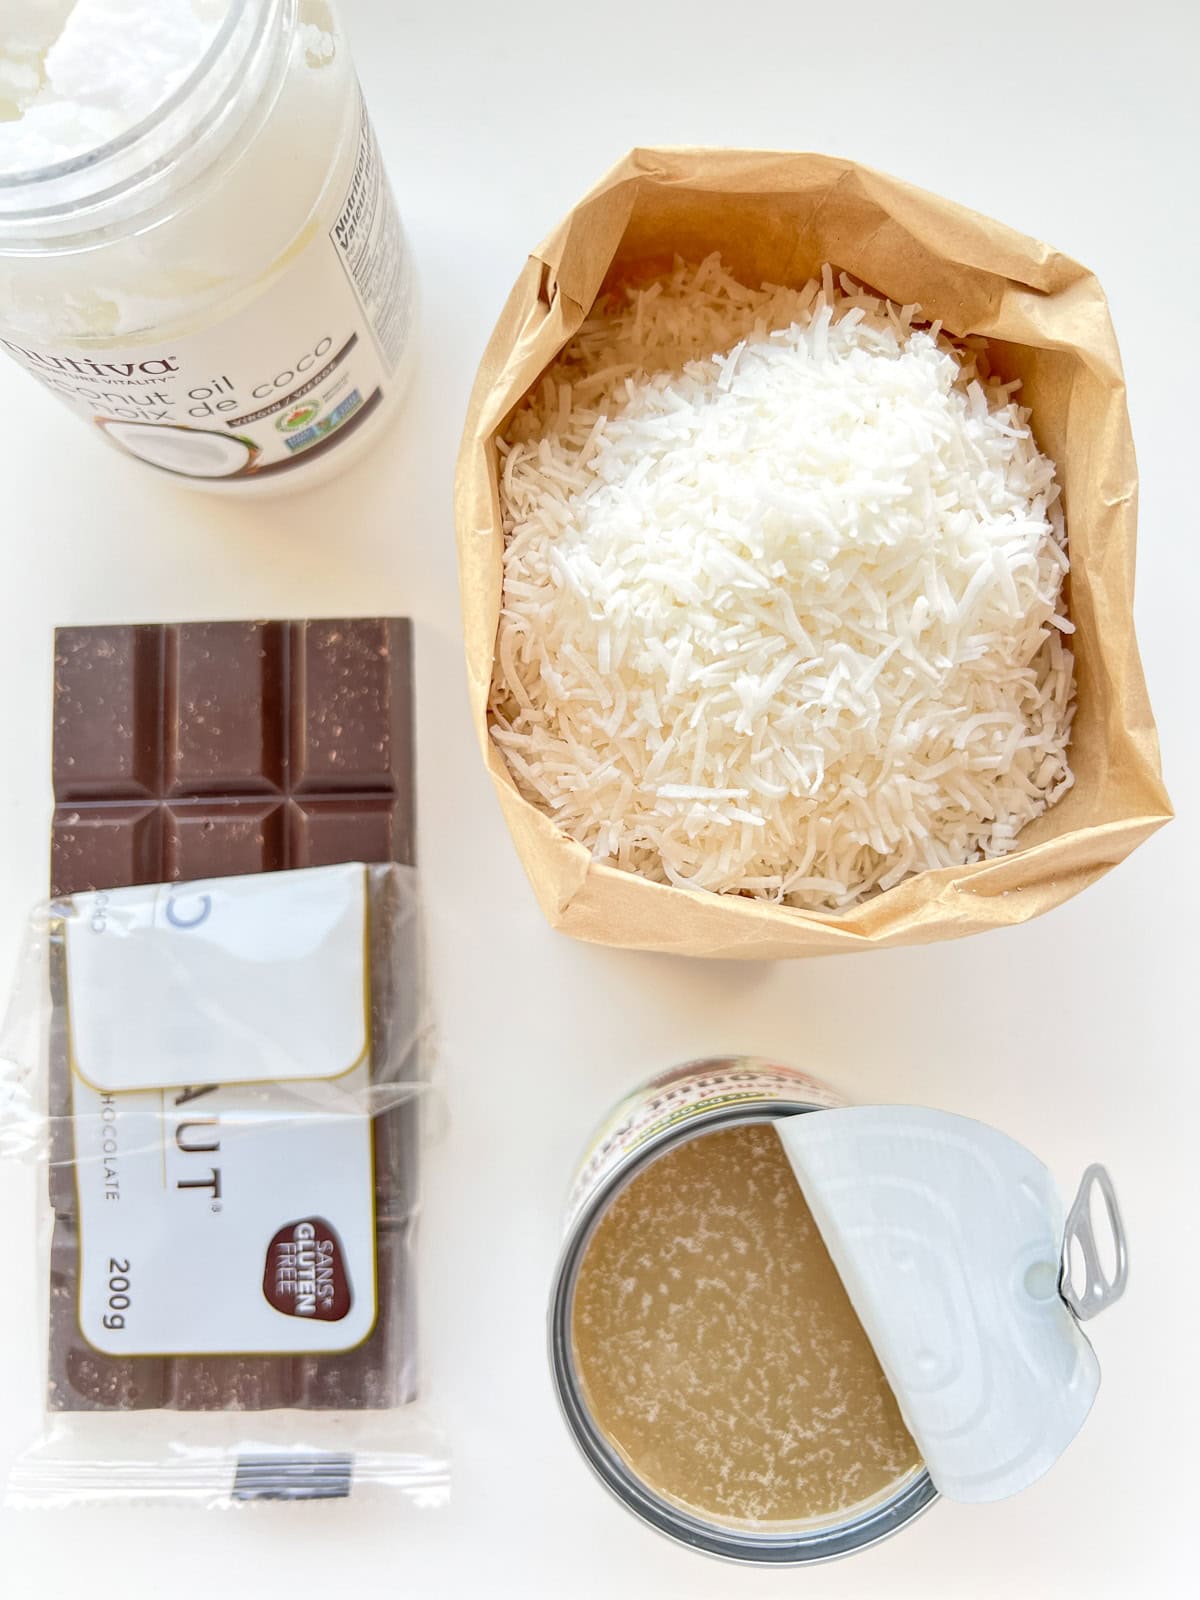
- 2 cups unsweetened shredded coconut NOT finely shredded
- ¾ cup condensed coconut milk *see notes
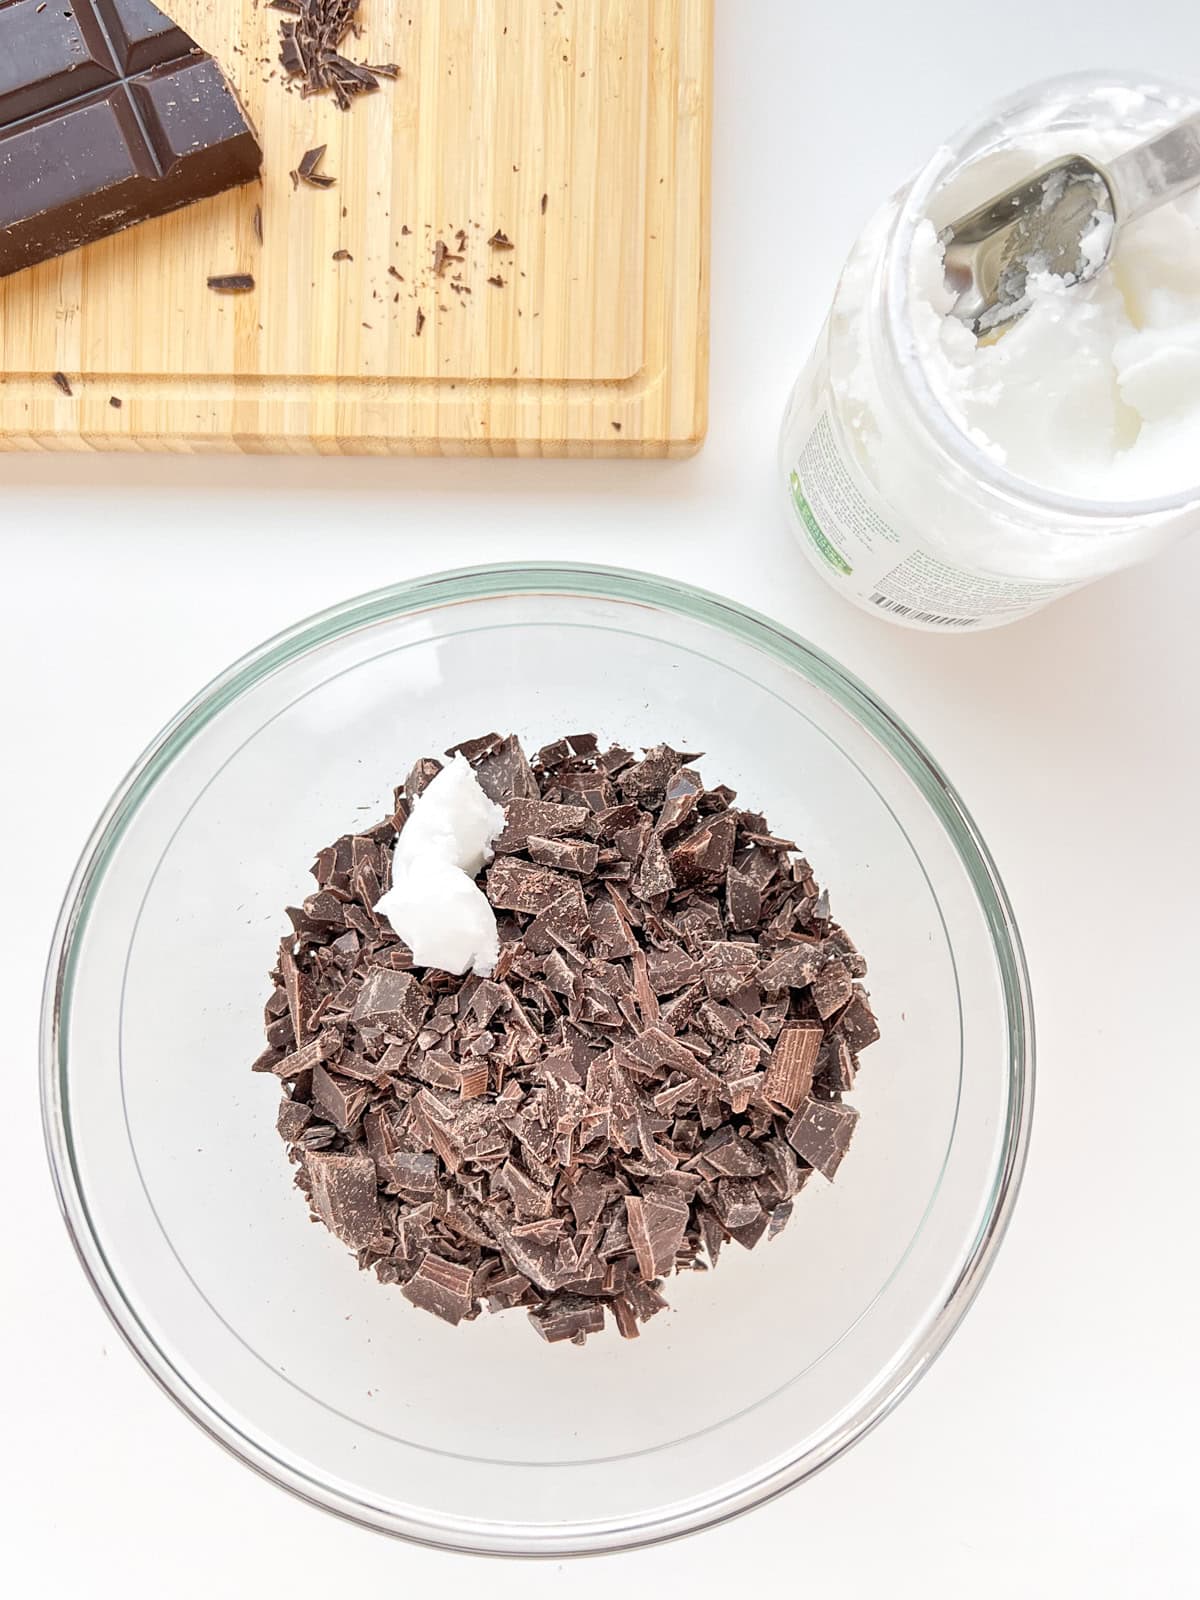
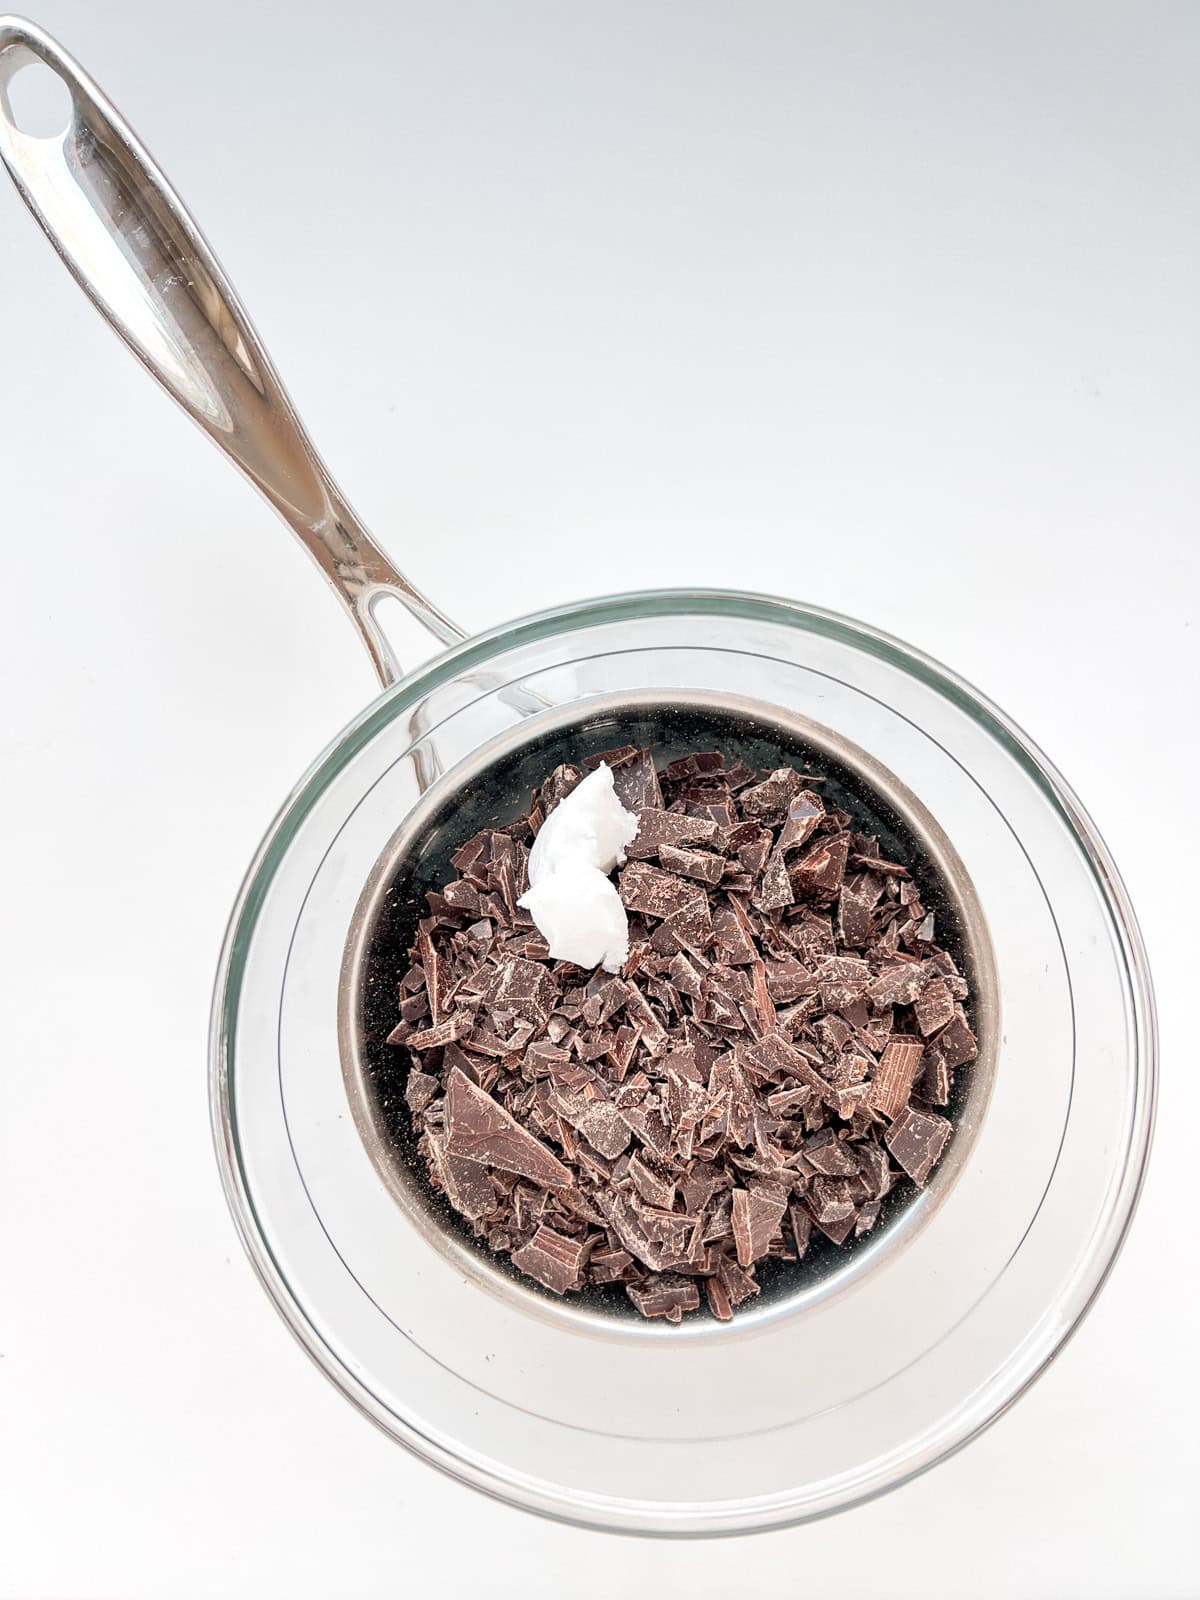
- 1.5 cups dark chocolate (confirm your chocolate is dairy free if vegan) cut into small pieces, or use chips/chunks
- 1.5 teaspoon coconut oil use virgin for more coconut flavour, but refined is fine too
- Optional toppings chocolate sprinkles, sea salt, crushed cacao nibs, ground nuts etc.
Instructions
- Prepare a medium size sheet pan with a sheet of wax or parchment paper - make sure the pan can fit into your fridge and freezer. Set aside.
- Set up your bain-marie - find a small to medium sized heatproof glass or ceramic bowl that will fit snugly on top of a small to medium sized pot without touching the water below. Add a few cups of water into the pan, put the bowl back on top and set aside.
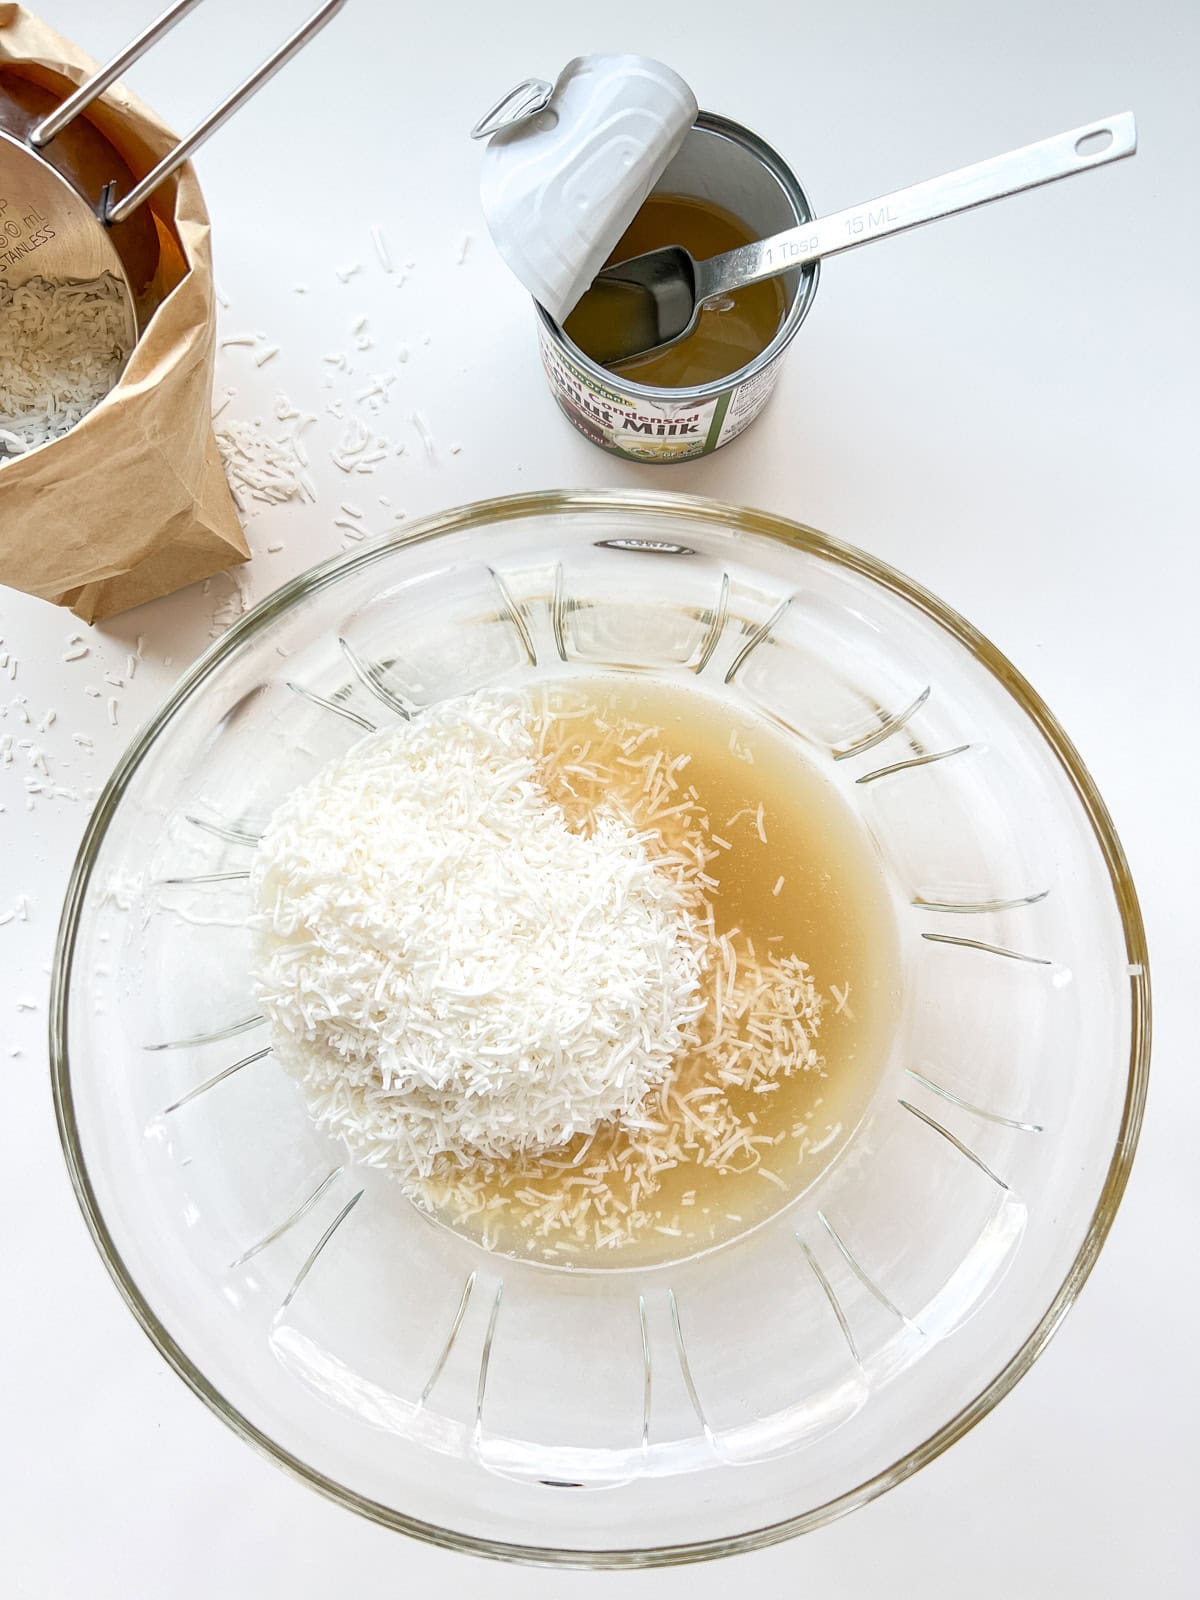
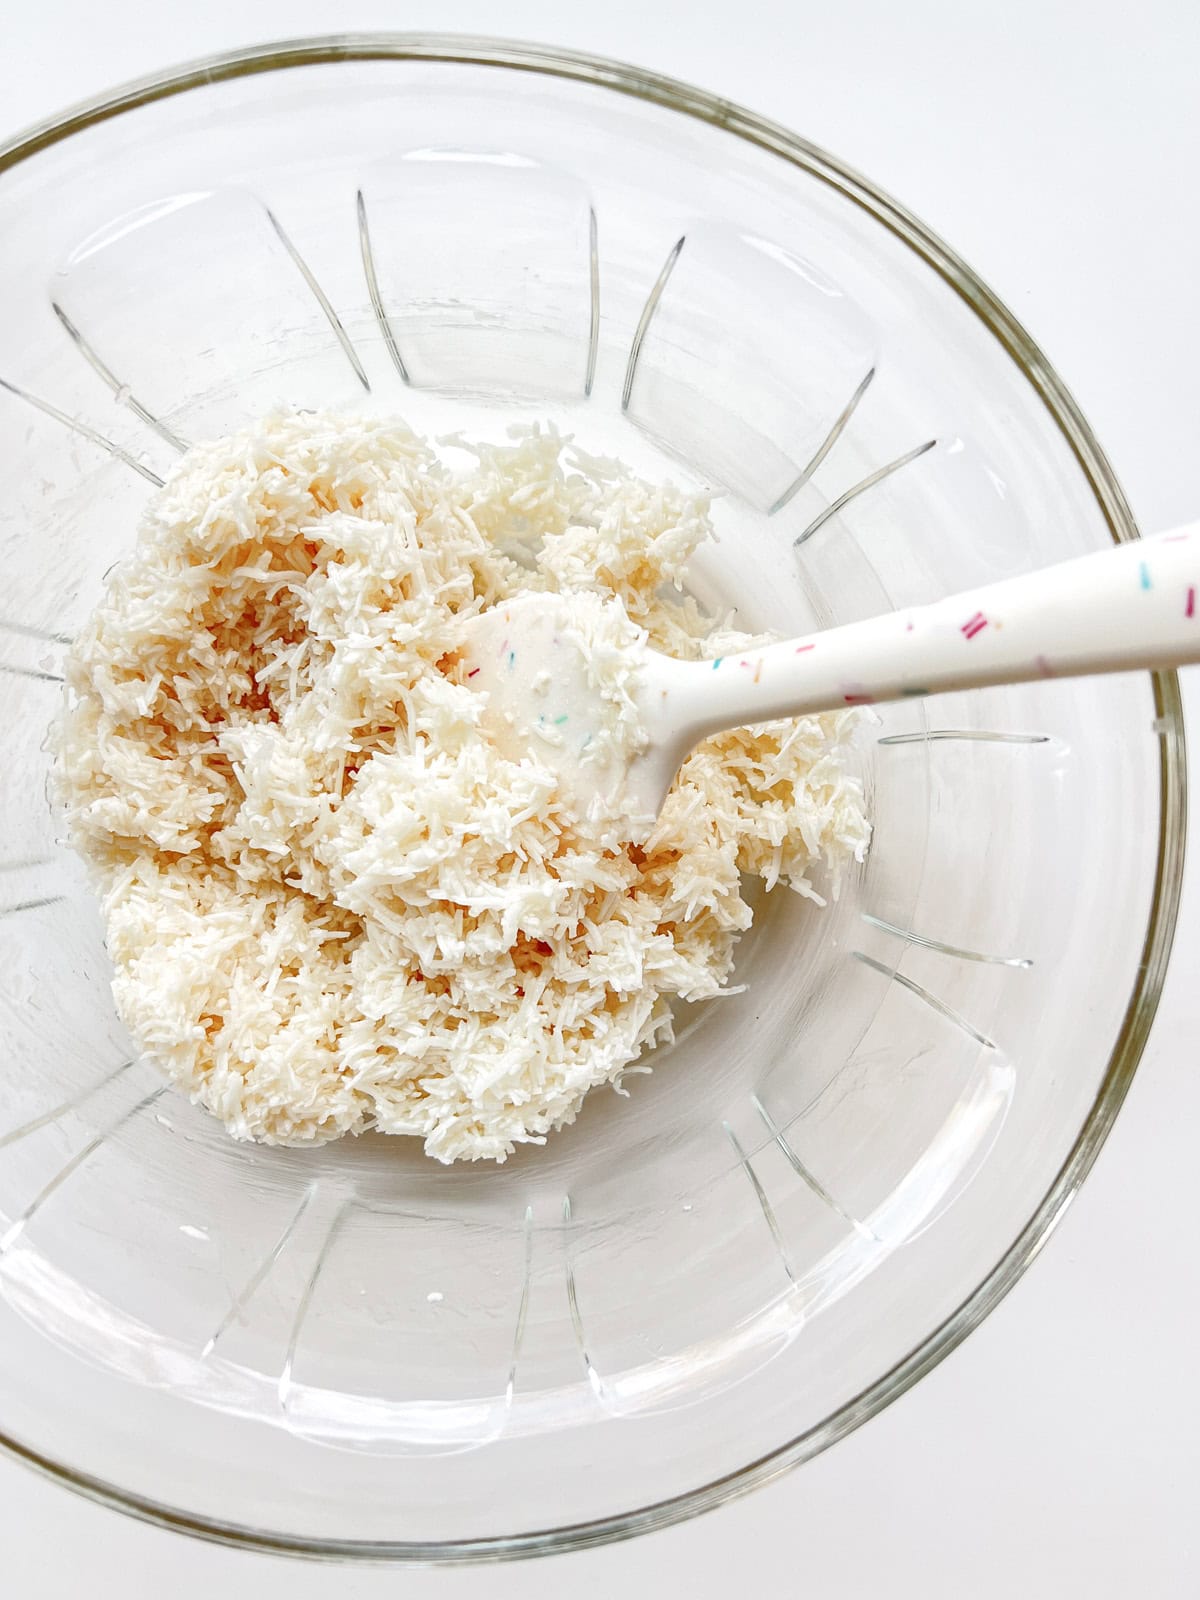
- Add the shredded coconut and condensed coconut milk to a medium size mixing bowl. Mix thoroughly, making sure all of the coconut is well combined with the condensed milk. Using a small 1 tablespoon scoop, a round tablespoon measure or a spoon if needed, scoop the mixture out onto the prepared sheet pan. As you scoop, or if you are using a spoon, you may need to tidy up the edge or press the mixture down into the scoop/spoon to make sure you have nicely packed bites. Pop your prepared coconut centers into the freezer to firm up for about 10 minutes.
- While the coconut centers are in the freezer, place the chocolate and coconut oil into the bowl on top of your bain-marie. Put the pan onto the stove on medium heat until the water inside comes to a simmer, but turn the heat down if steam escapes - any steam or water touching your chocolate may cause it to seize. Melt until the chocolate and oil are melted and full stir together until you have a melted and glossy liquid.
- Optional: If you want to use some fun toppings, such as chocolate sprinkles, salt, or cacao nibs on top of your chocolate coconut bites, have those ready nearby in small pinch containers.
- Take your sheet pan with the coconut centers and place on the counter. Next to it, place a trivet on the counter and put your bowl of warm chocolate on top. Using two forks, or small tongs if you prefer, dip each coconut centre into the melted chocolate, turning around as needed to thoroughly coat the balls. If you have the patience to remove any excess chocolate, gently scrape the bottom of each bonbon across the edge of your bowl before moving back to your sheet pan, but this is not essential.
- Sprinkle your coated bonbons with toppings immediately if using. Continue until all the centers have been dipped, then move the tray to the fridge for at least 10 minutes to set up.
- Enjoy your bonbons at room temp - leave in a tin on the counter for a few days if they last that long, or store in the fridge if you can somehow leave them for longer than a few days!

Leave a Reply