Made with just 6 ingredients, these Salted Peanut, Chocolate, and Date Bars are just the thing I want to reach for during an afternoon slump, when guests drop by, or anytime I need a treat. Indulgent and still healthy-ish, just a few pantry ingredients and an easy no-bake process stands between you and your new favourite plant-based treat.
Jump to:
The ideal dessert/sweet treat hybrid
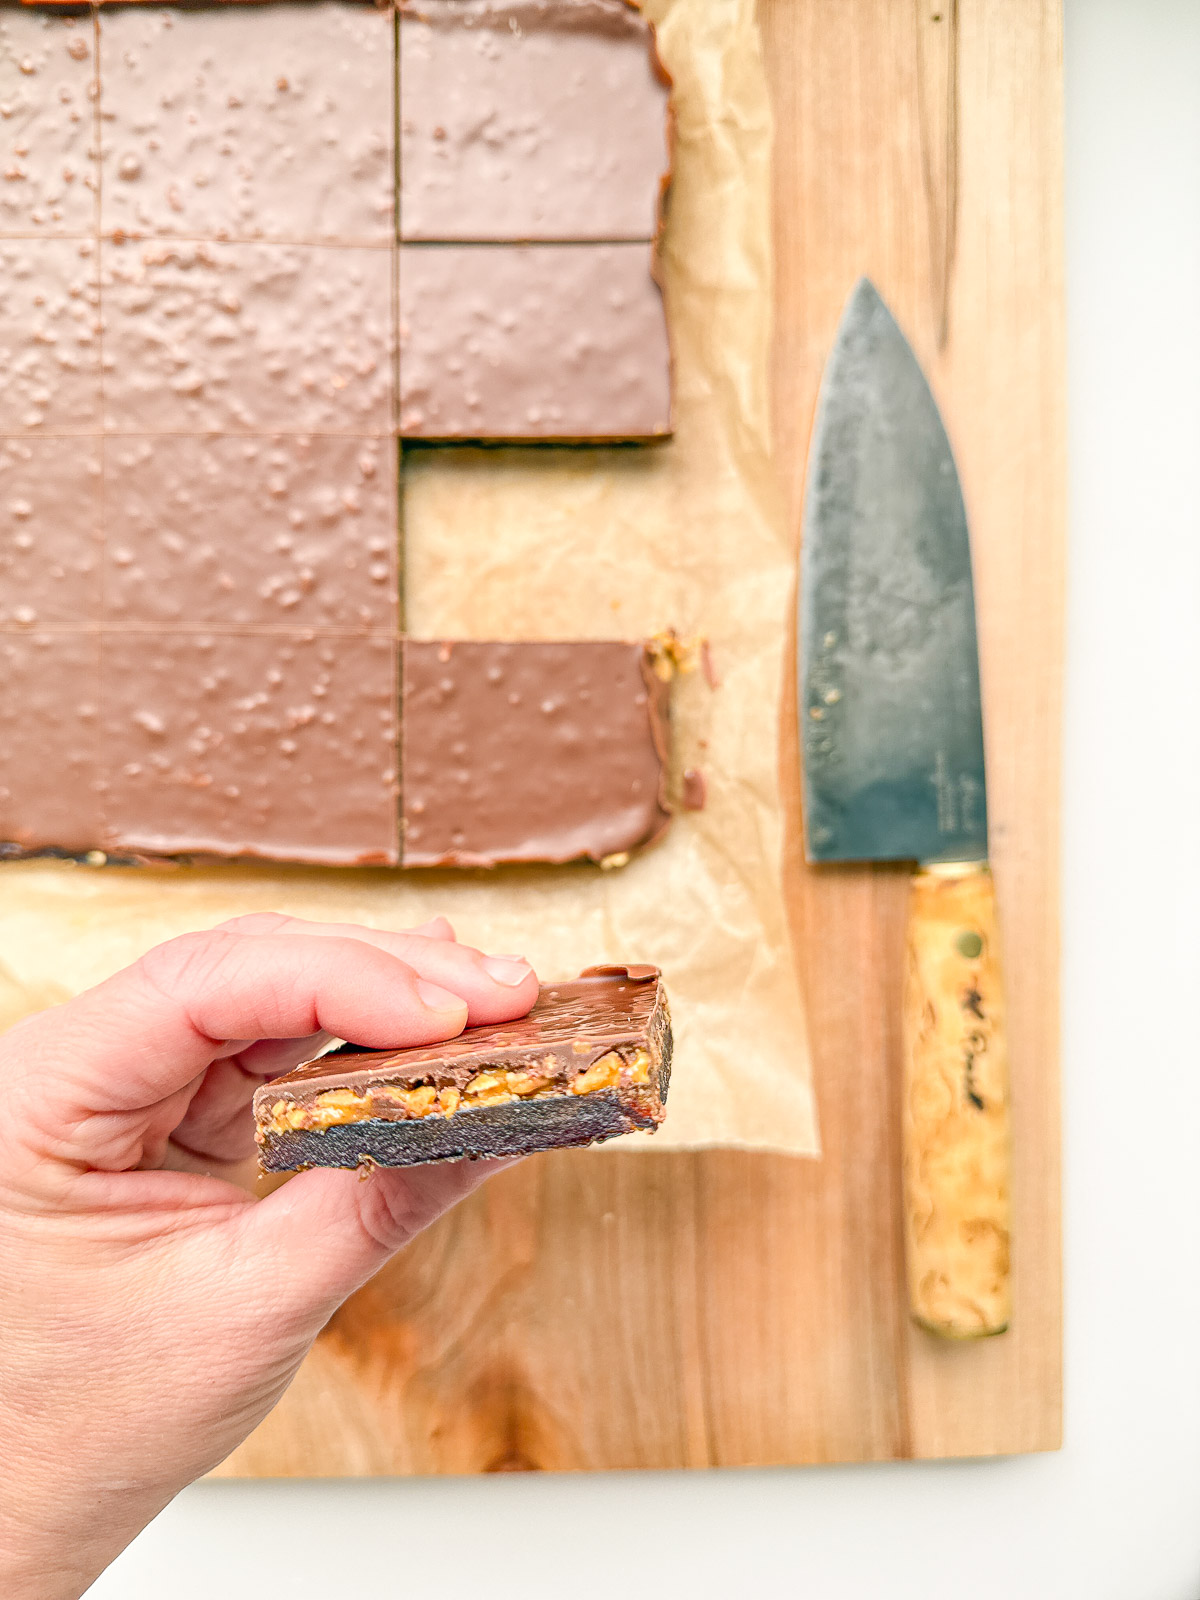
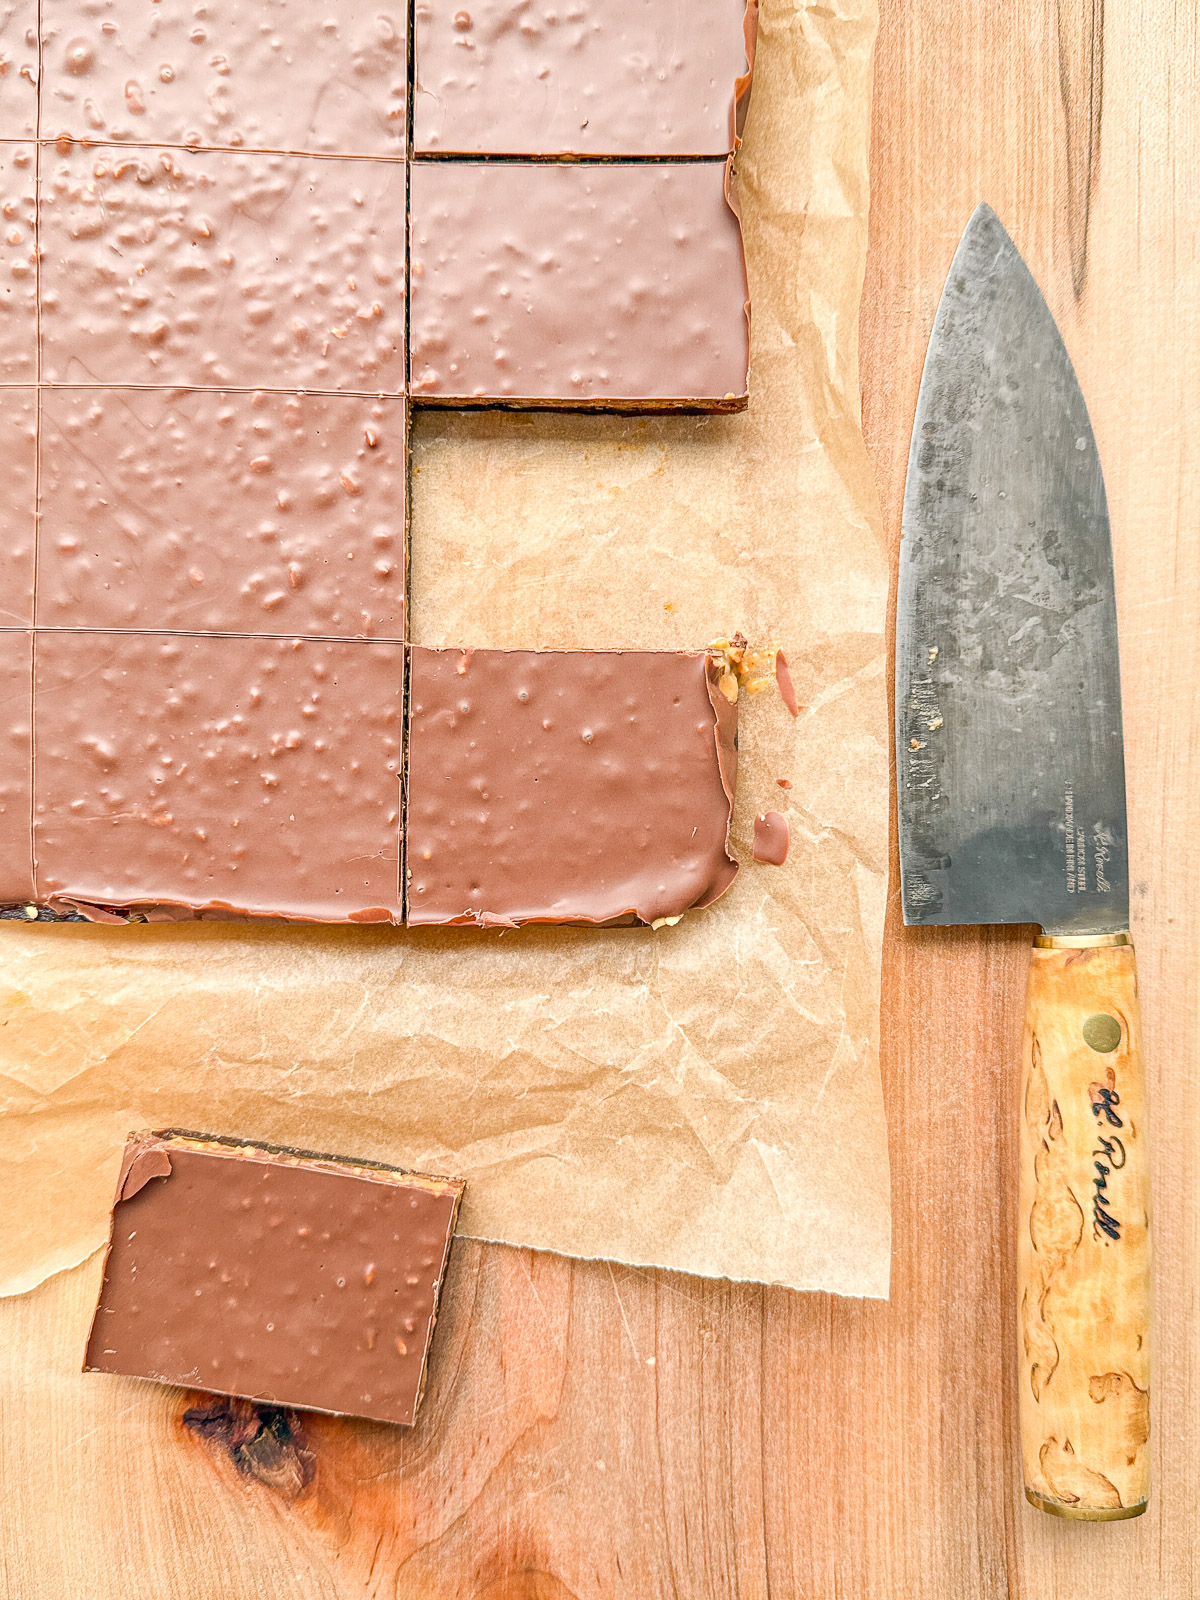
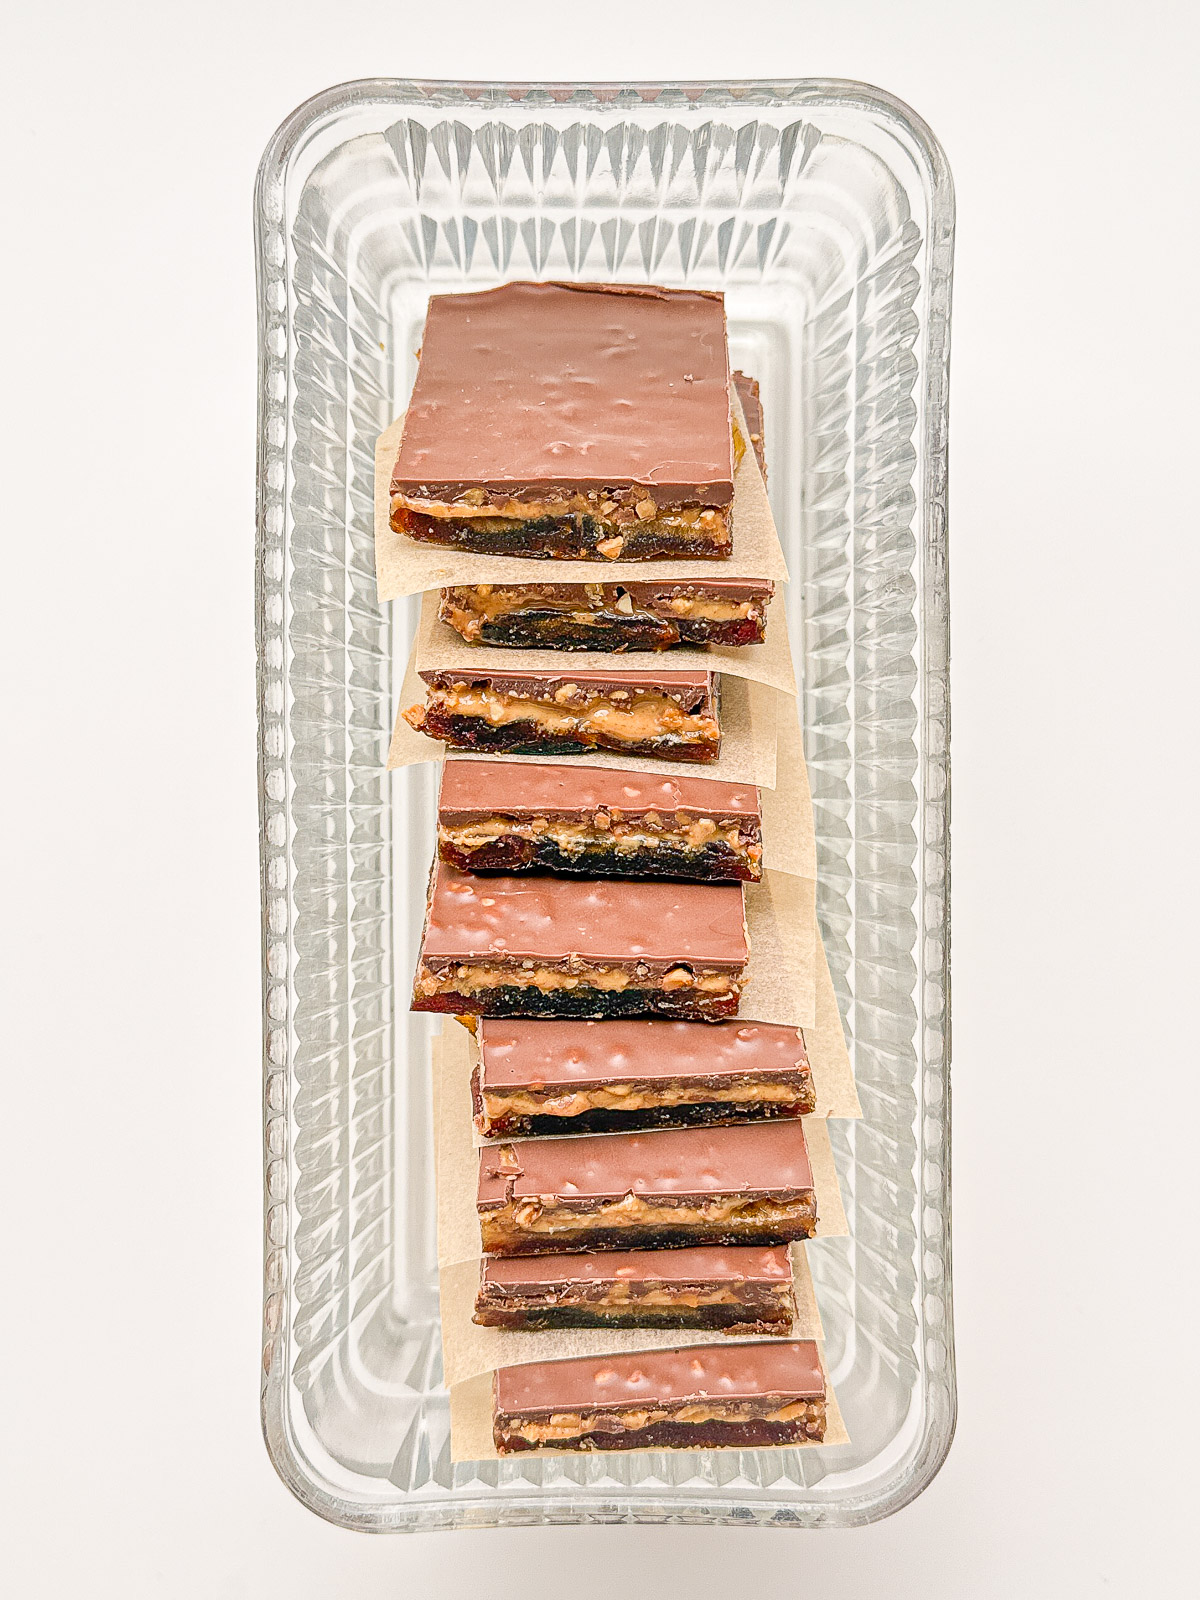
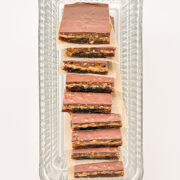
Sweet and salty, with a moreish range of textures from fudgy and slightly chewy, to crunchy and smooth, these Salted Peanut, Chocolate, and Date Bars are the ideal cross between a candy bar and a dessert square. Inspired by “date bark" and by a certain unnamed peanut and caramel candy bar, this healthier yet still indulgent treat pairs the natural candy-like nature of medjool dates, with two kinds of peanuts - crushed roasted peanuts and natural peanut butter - for both taste and texture, a nice sprinkling of flaky sea salt to balance the sweetness, and a shiny layer of chocolate to top everything off. After a short stint in the fridge to firm up, the bars are easily cut into servings, from snack size bites readily tucked into lunches and bags, to larger dessert size bars, which is the size you know I am having, around 3 pm each afternoon!
Ingredients
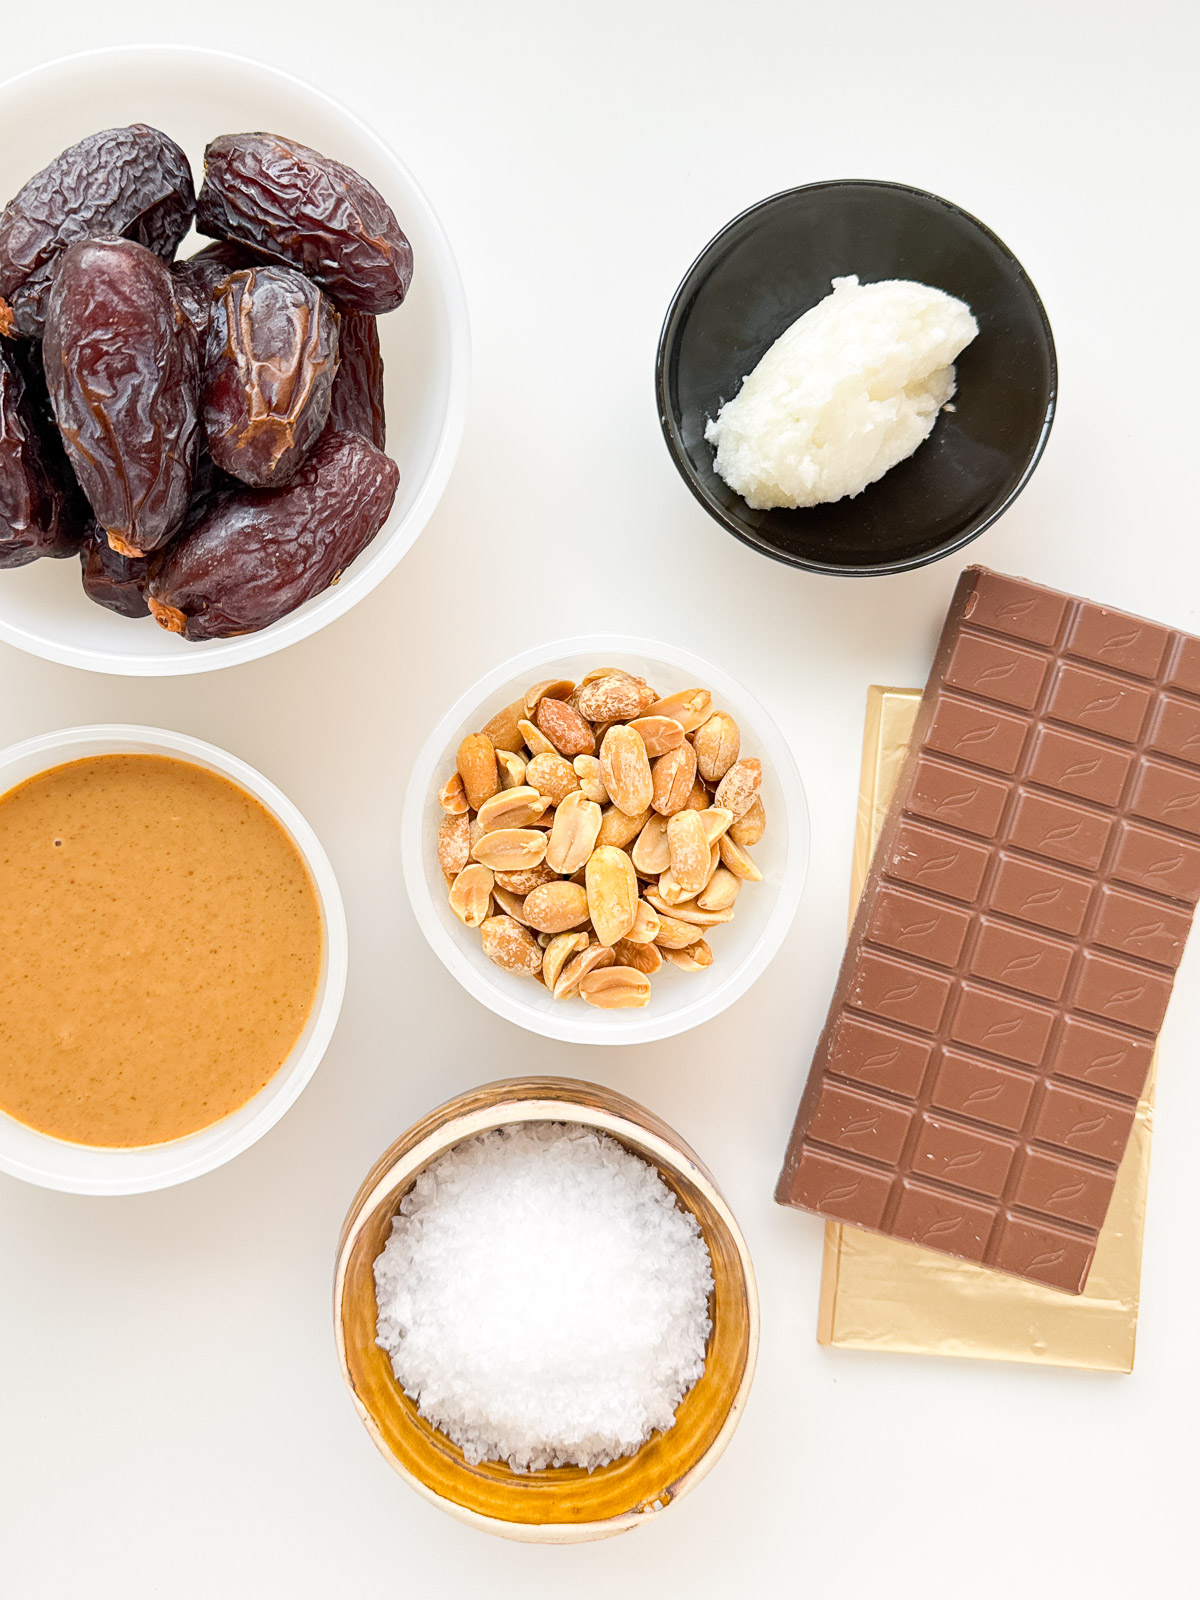
All you need for Salted Peanut, Chocolate, and Date Bars is:
- Medjool dates
- Roasted unsalted peanuts
- Natural peanut butter
- Flaky sea salt
- Chocolate
- Coconut oil
Method
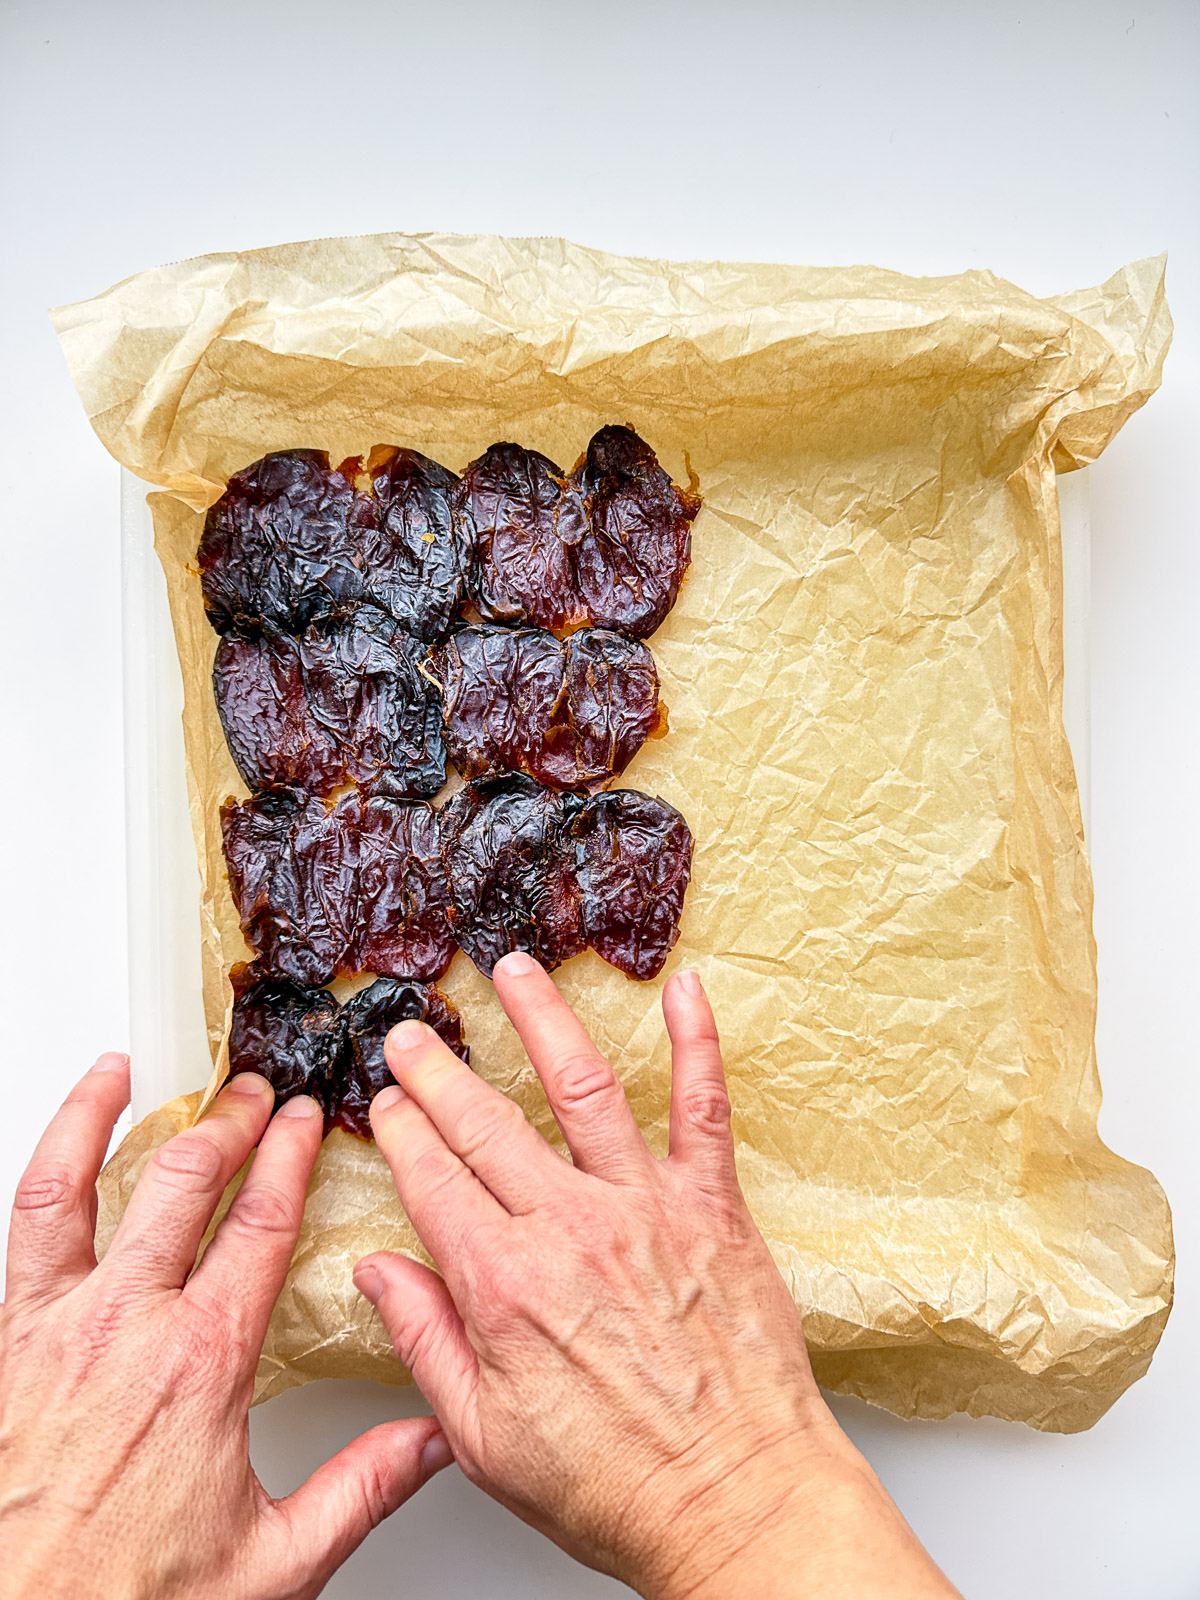
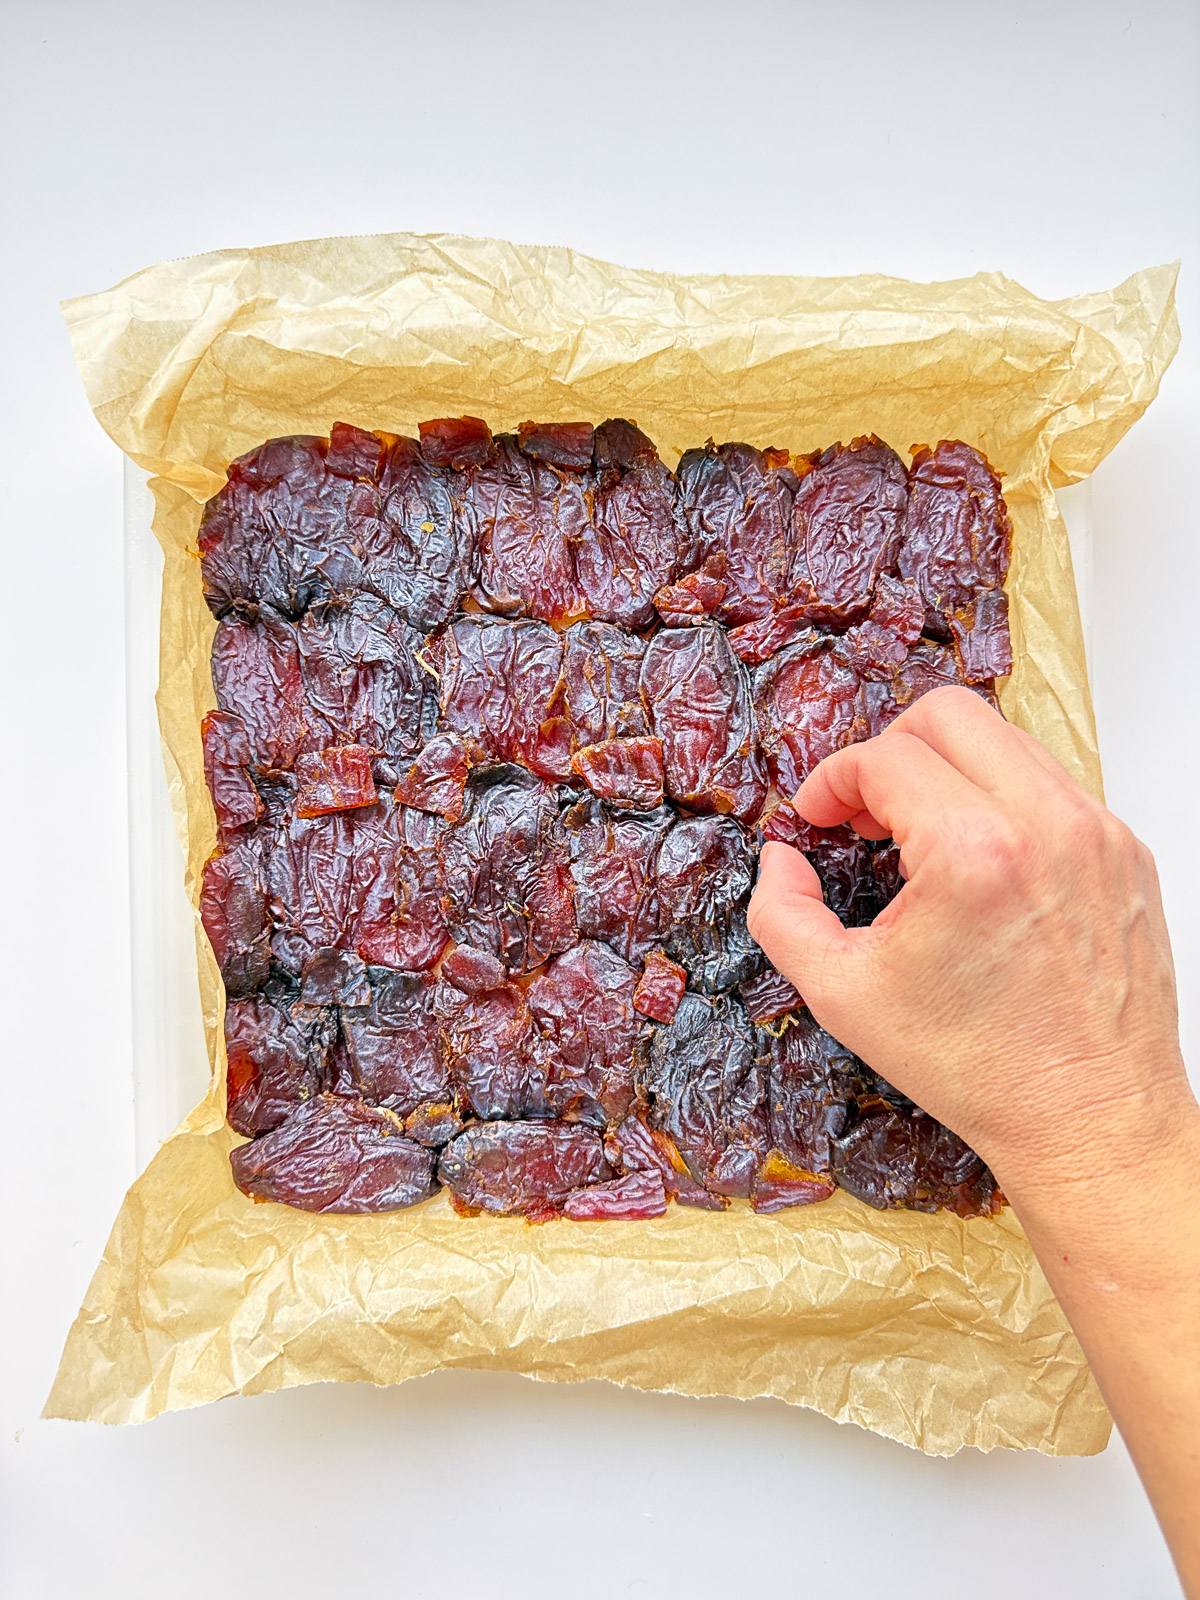
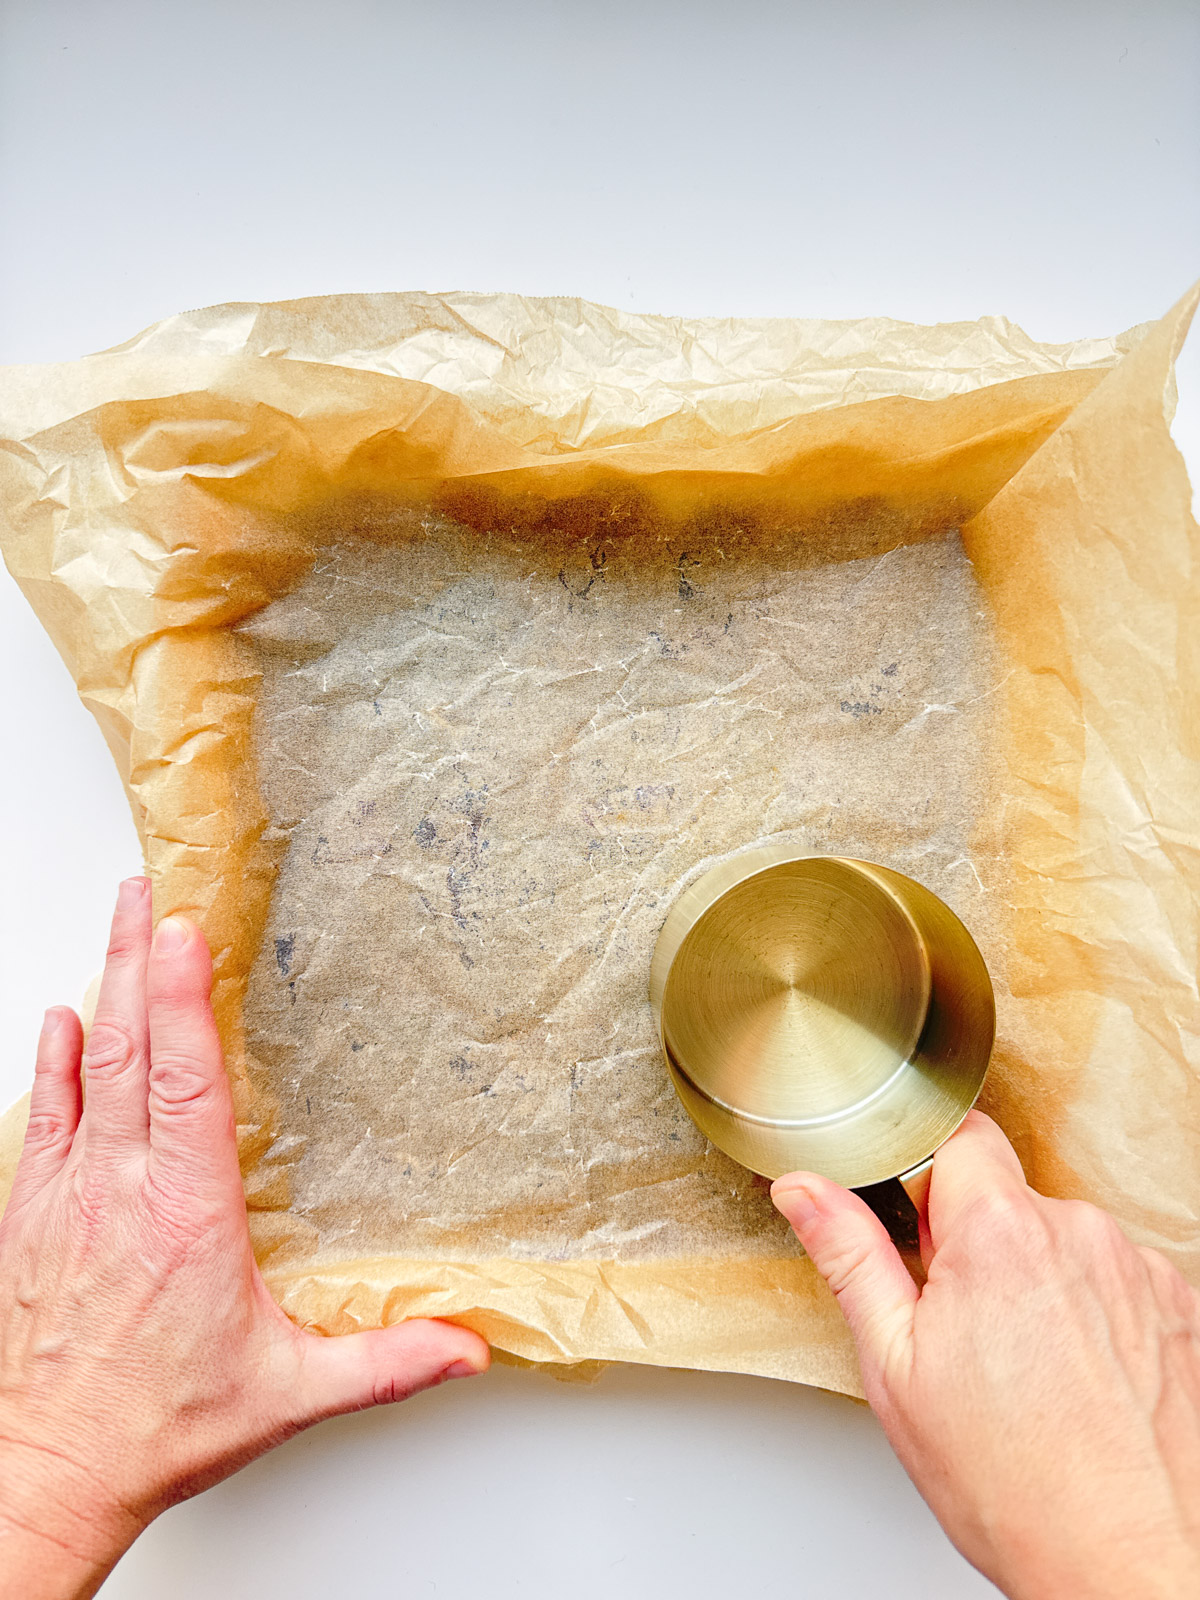
Making Salted Peanut, Chocolate, and Date Bars is easy and straightforward. To make the bars, start with a square tray or dish lined with parchment paper. Flatten the pitted dates side by side onto the lined tray or dish, interior sticky sides facing down, until the entire surface is covered. Cover the date layer with another piece of parchment paper, and use a measuring cup or the bottom of a heavy glass to further flatten and even out the date layer.
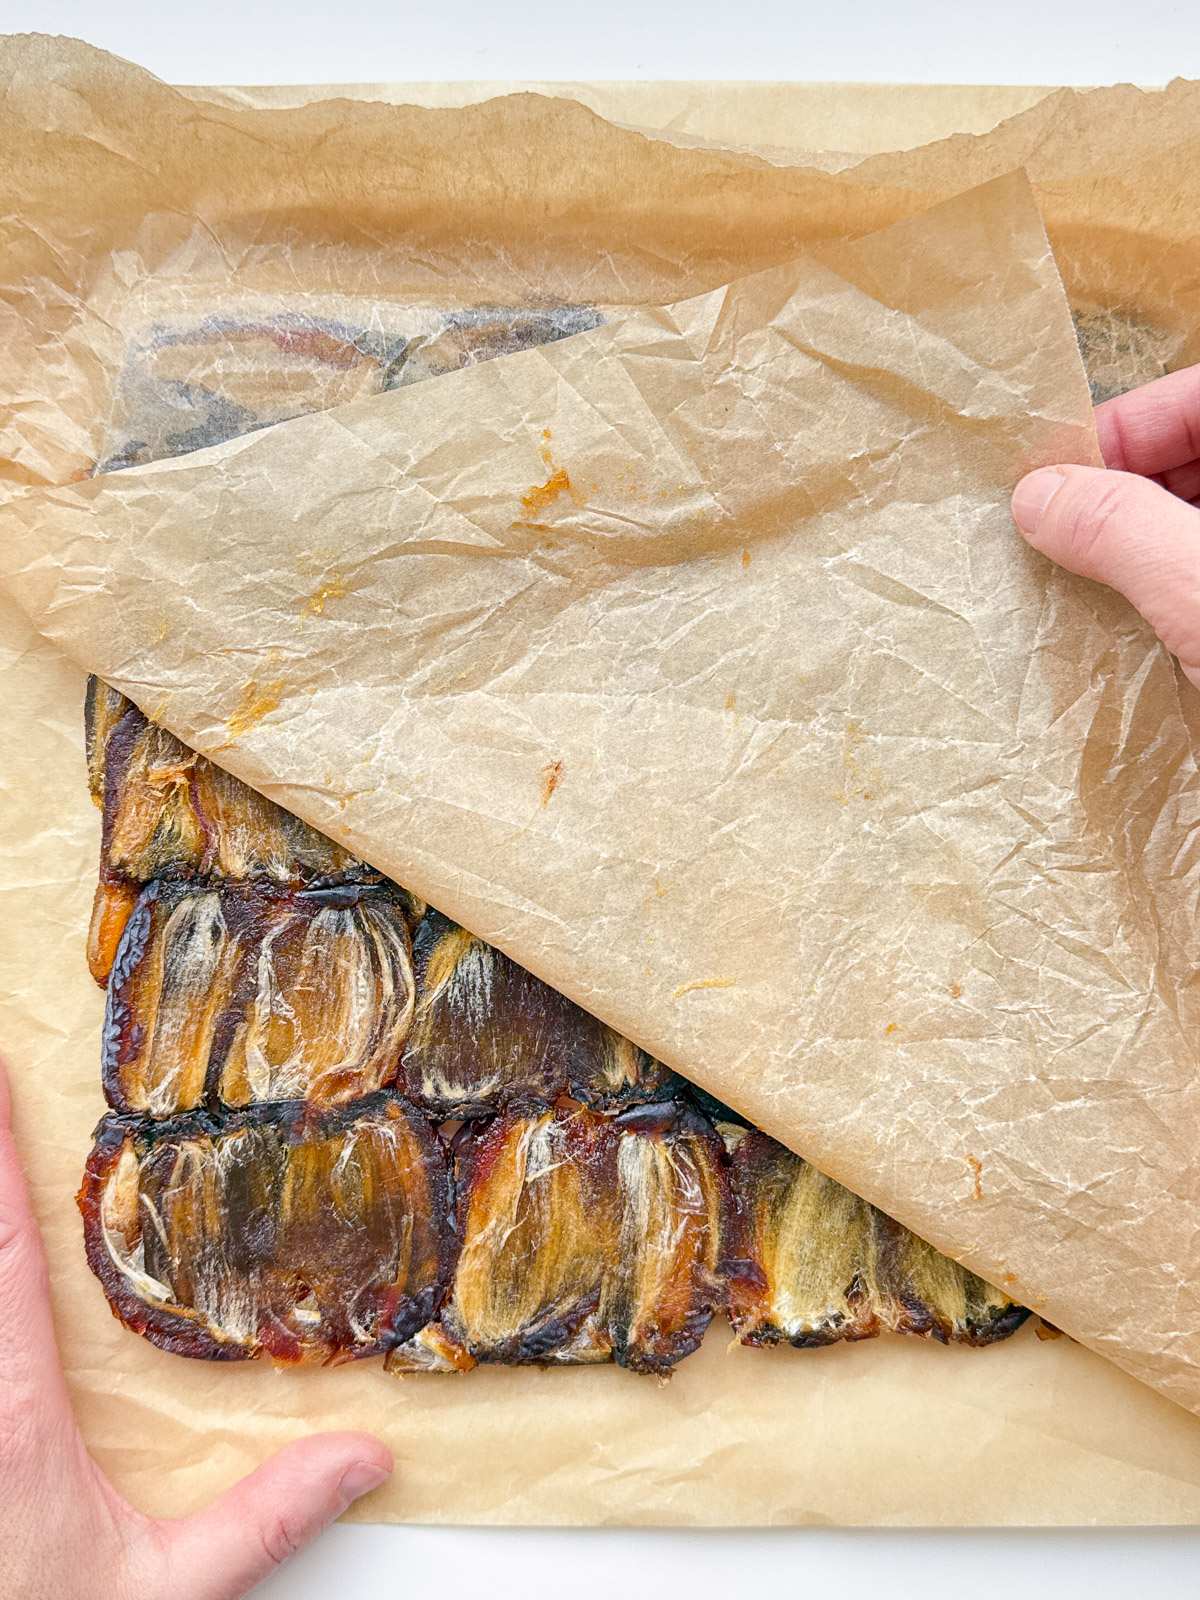
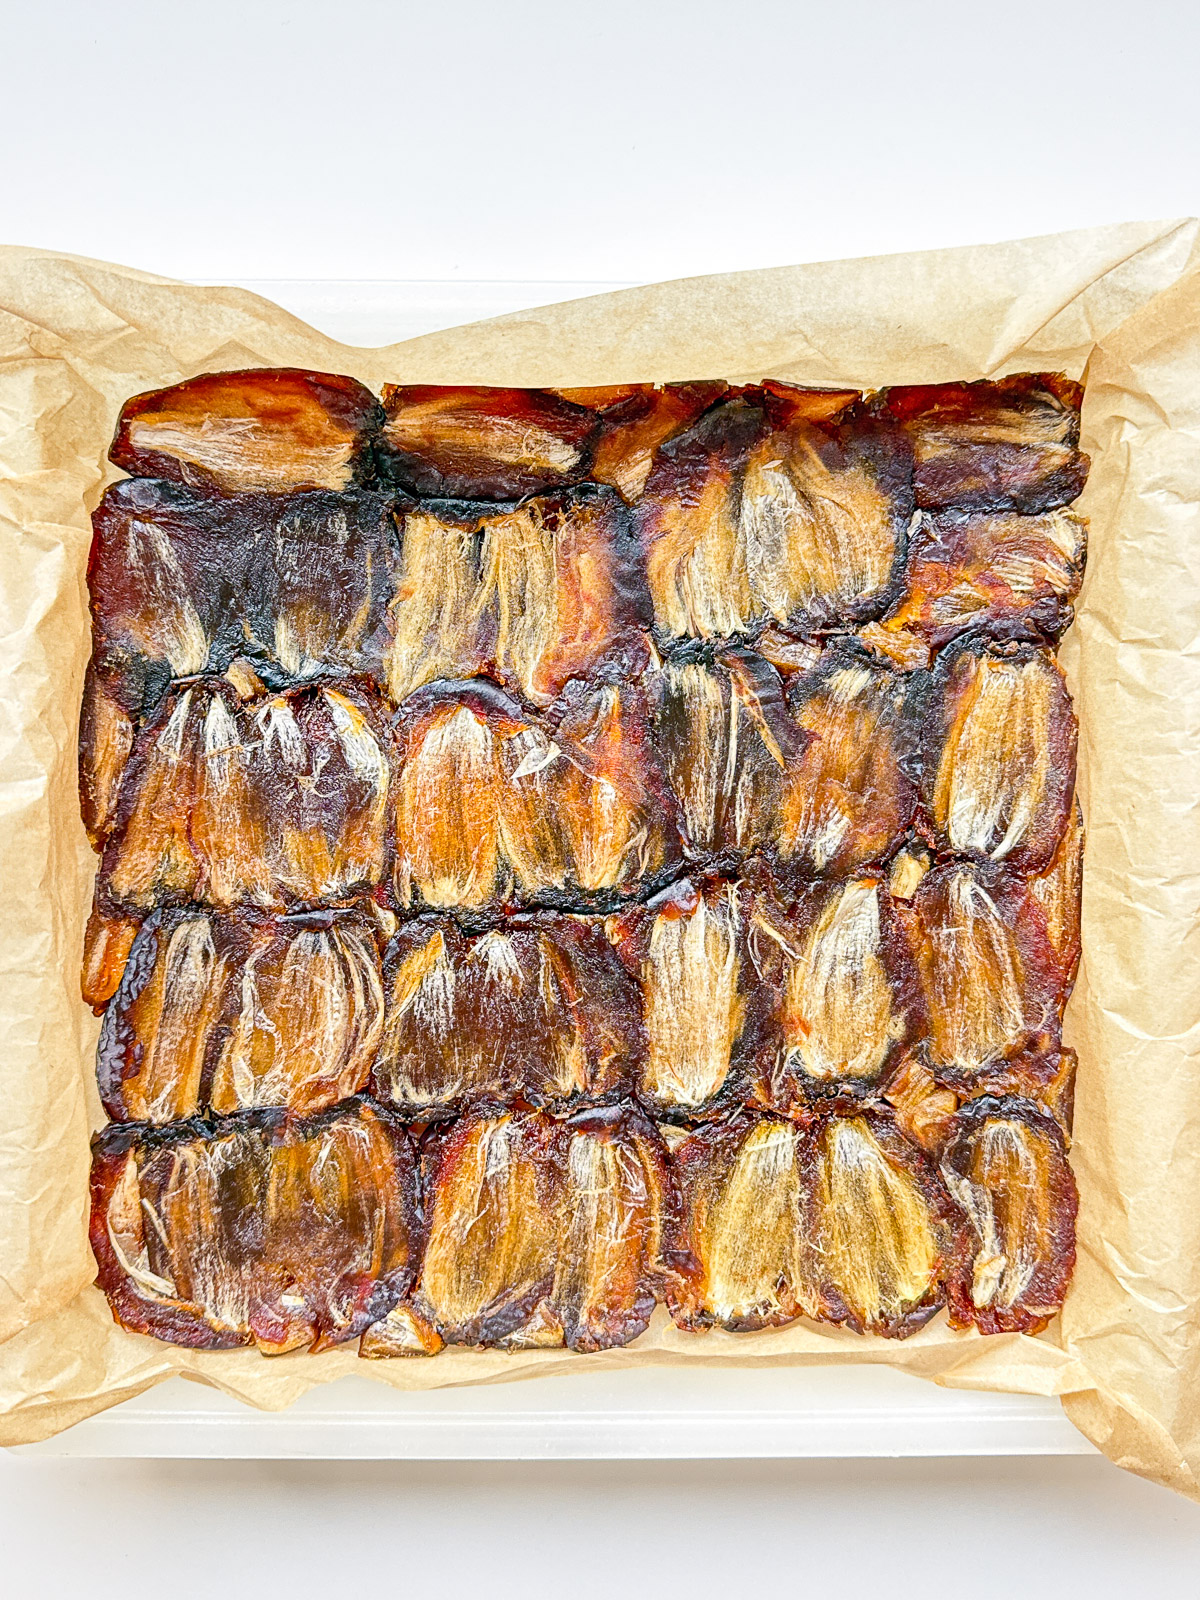
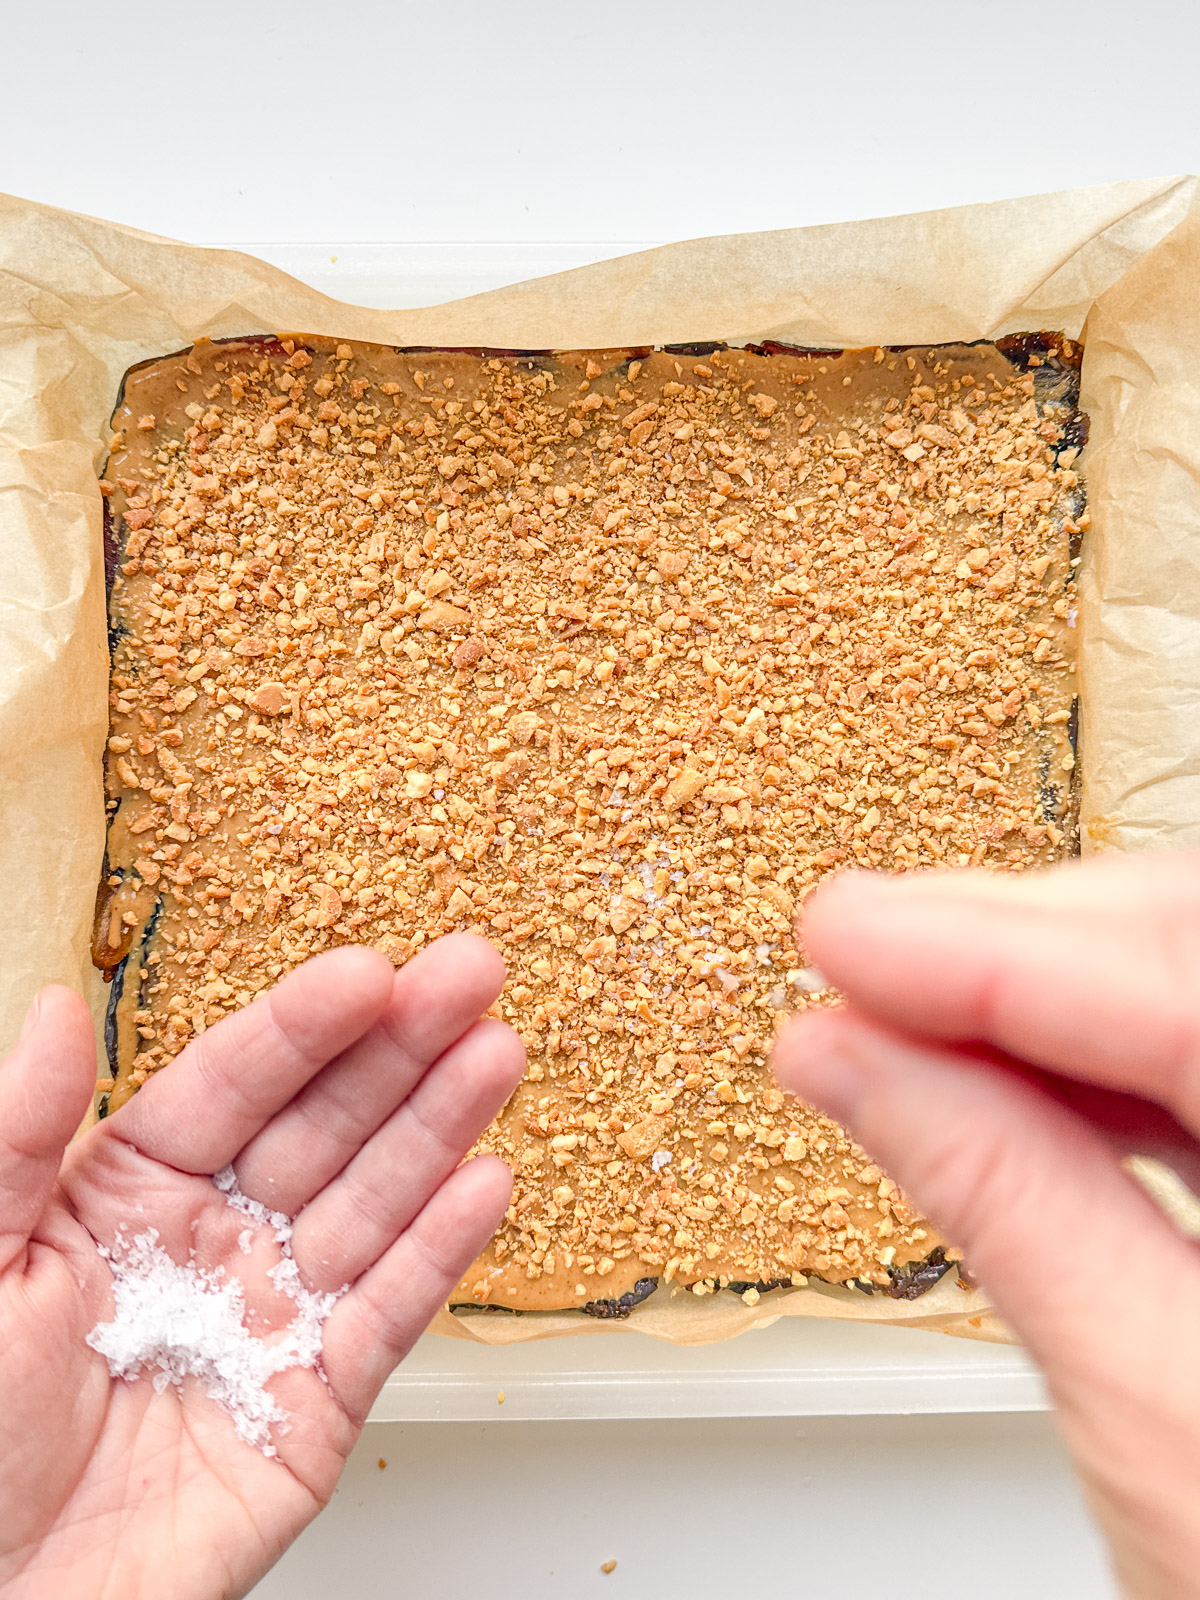
Flip the date layer over, so that it is now sticky side up, and remove the top layer of parchment paper. Spread on the peanut butter, sprinkle on the crushed peanuts and sea salt, and top with the melted chocolate mixture. Let the bars set up in the fridge, and then cut into the serving size of your choice for a treat at any time of the day.


A note on Medjool dates
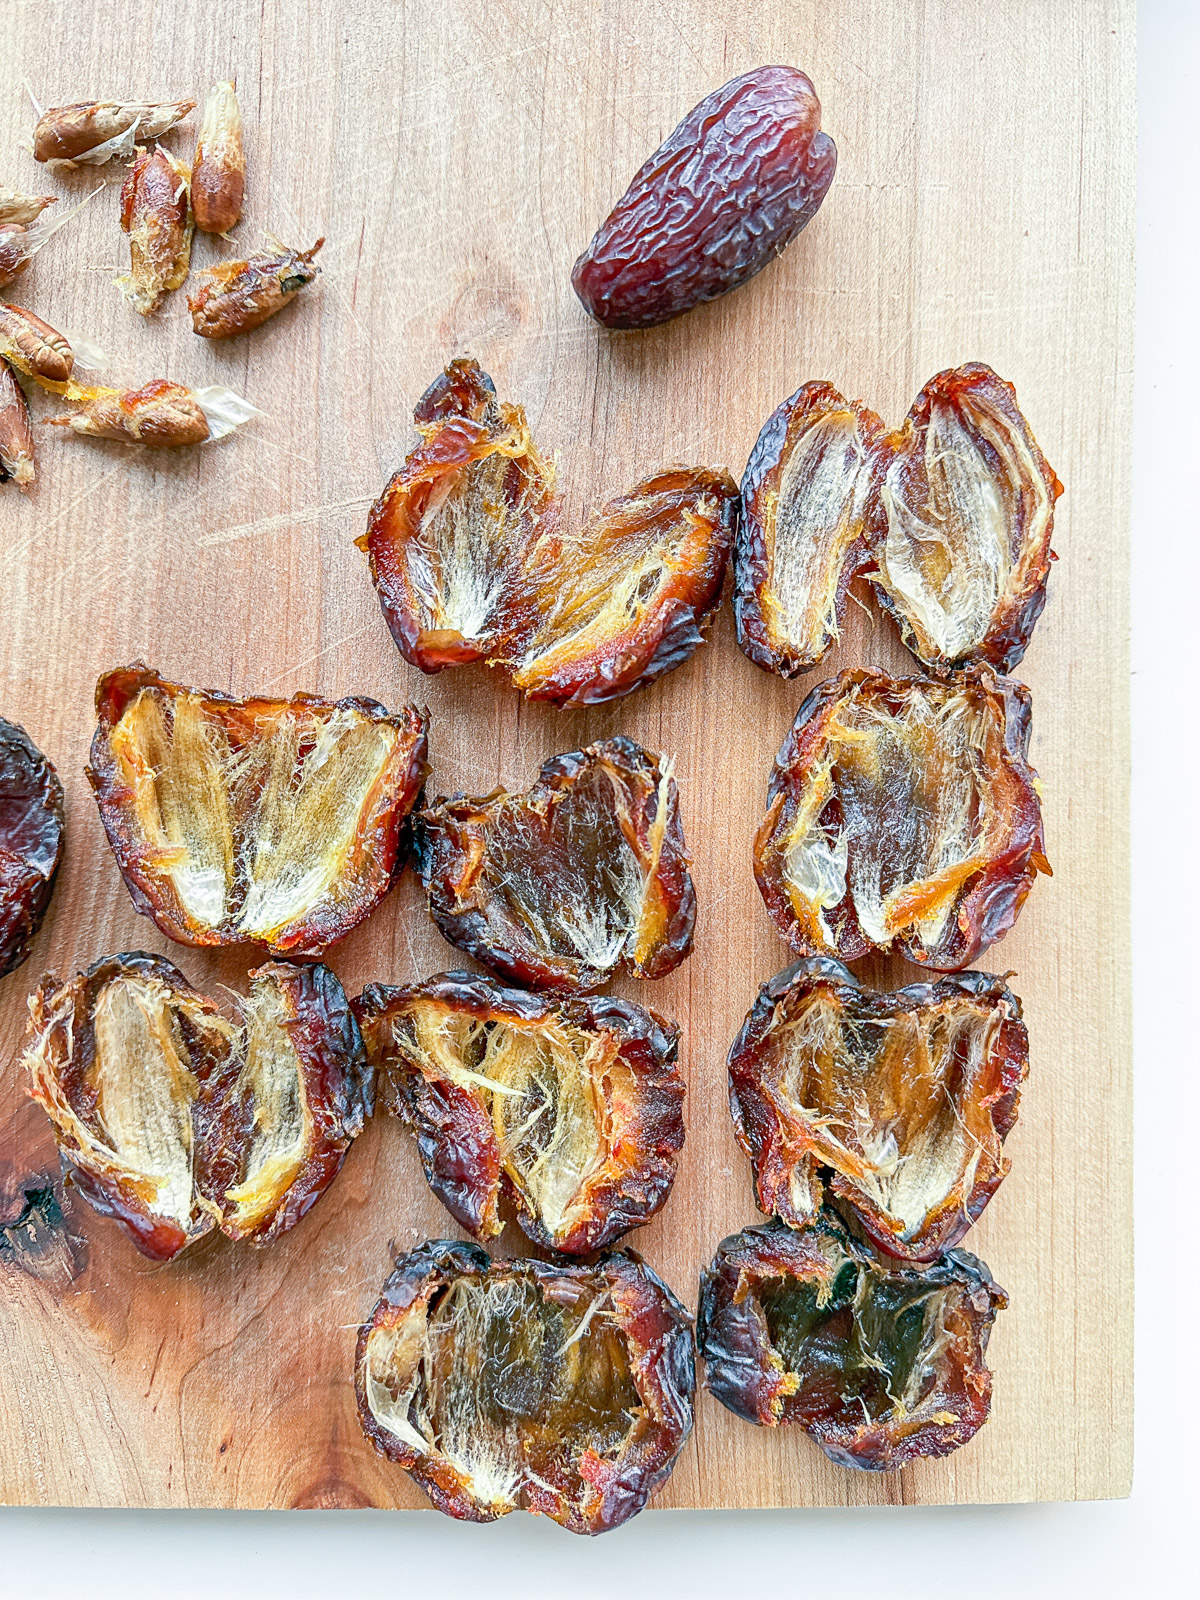
Originating in Morocco, and grown across the Middle East and the United States, Medjool dates are moist, and naturally caramel-like in flavour. While in general Medjool dates are large and tender, they do age, becoming drier over time. A recently produced Medjool date will be plump and is easily torn apart. Medjool dates that have been sitting in a store or cupboard for a number of months can be quite a bit chewier, sometimes to the point of being leathery, and visibly dry looking.
I save those excessively dry dates for cooking, and make sure to use dates that are on the plumper side for this recipe. While you could use other kinds of dates for this recipe, I am such a fan of Medjool dates that I rarely use any other variety.
A note on which chocolate to use
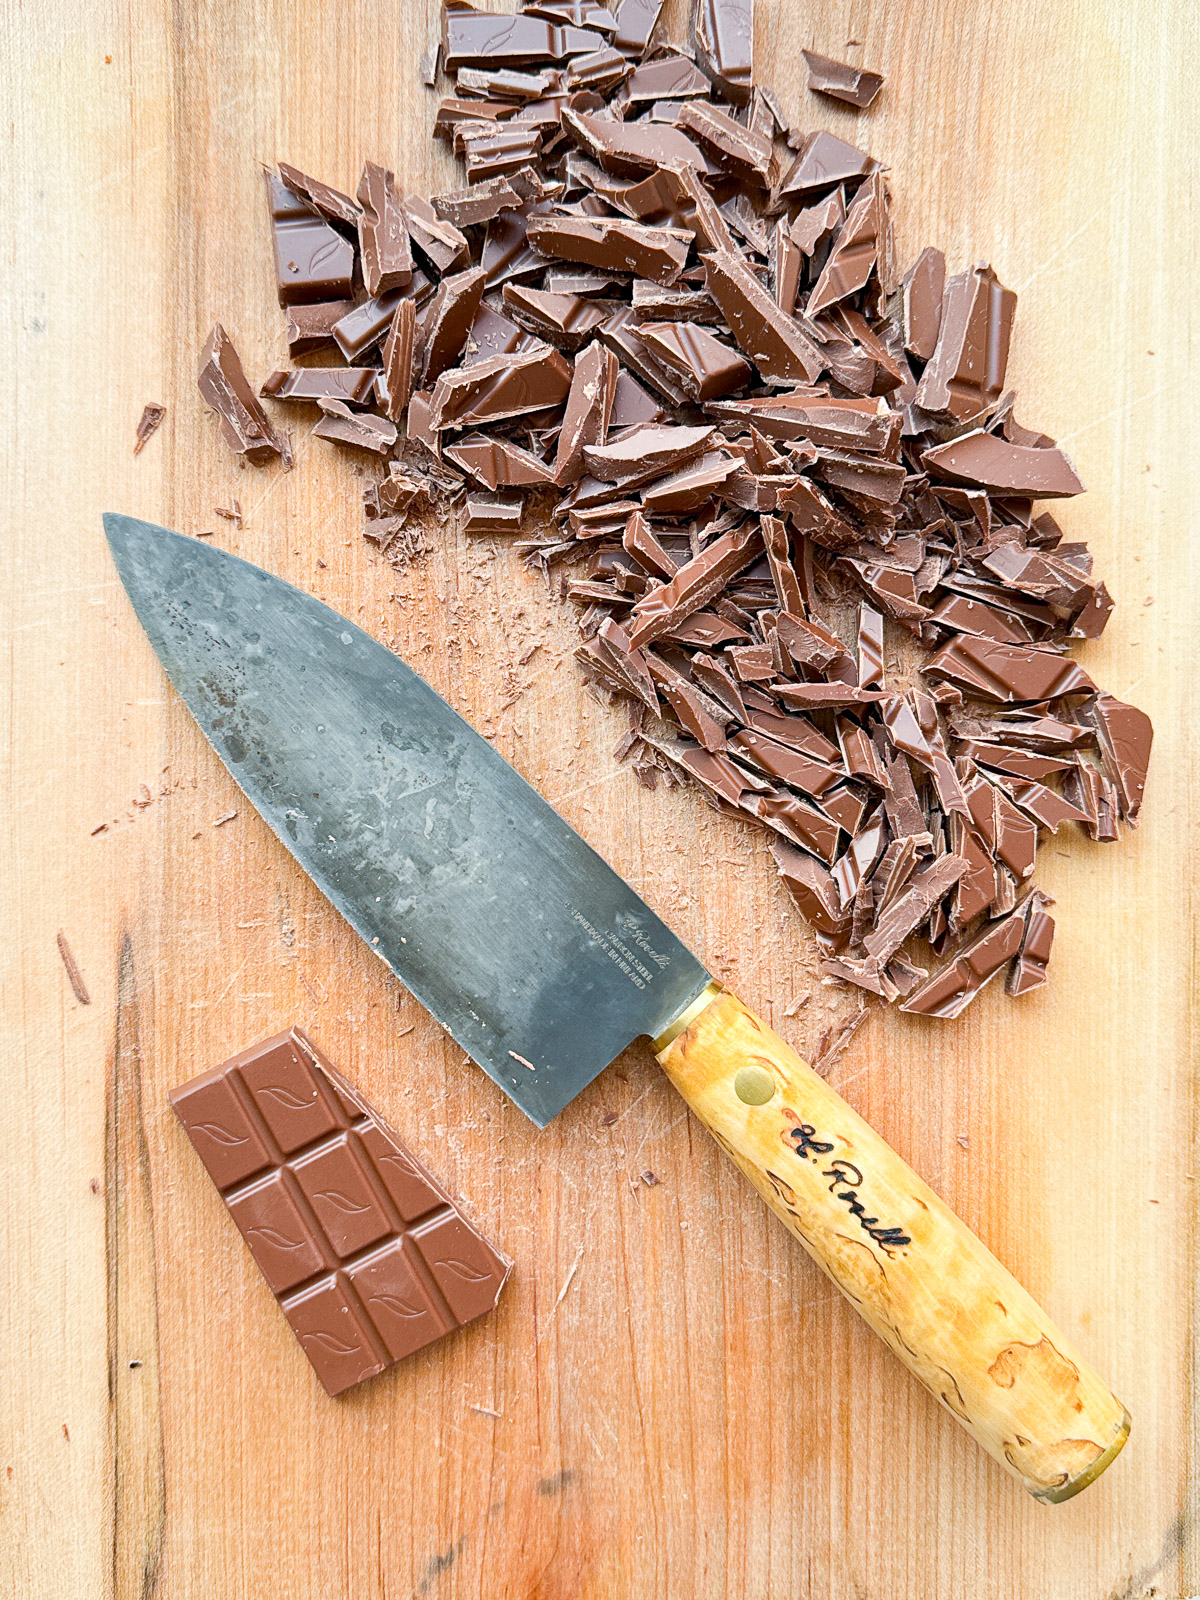
If you’re going for something a tad healthier, dessert-like, or a bit more sophisticated, you might choose to use a dark chocolate here for the top layer. I like to mix dark and milk chocolate together, or even just use milk chocolate, so that the effect is a bit more like a candy bar. Of course, if you don’t consume dairy, make sure to choose a vegan chocolate in either case, and there are a number of lovely plant based oat milk chocolates out there, so choose what you prefer and have access to.
Storage
I find these bars keep best in the fridge for up to a few weeks or even longer, although I highly doubt they will last that long! I like to keep the bars stacked in a glass container, and if I’m packing one to go, I wrap each bar up like a little package with parchment paper, which is a truly pleasing thing to unwrap later on.
More recipes to explore!


Salted Peanut, Chocolate, and Date Bars
Ingredients
- 16-20 medjool dates pitted and opened flat
- ½ cup natural smooth peanut butter
- ½ cup roasted peanuts finely chopped, using a mini chopper or chopped with a knife
- ½ teaspoon flaky sea salt or more to taste
- 180 grams chocolate chopped; preference of milk, dark, or half and half (confirm your chocolate is dairy free if vegan)
- 1.5 teaspoon refined coconut oil
Instructions
- Line a square pan or dish with parchment paper - I use a 9 x 9 dish.
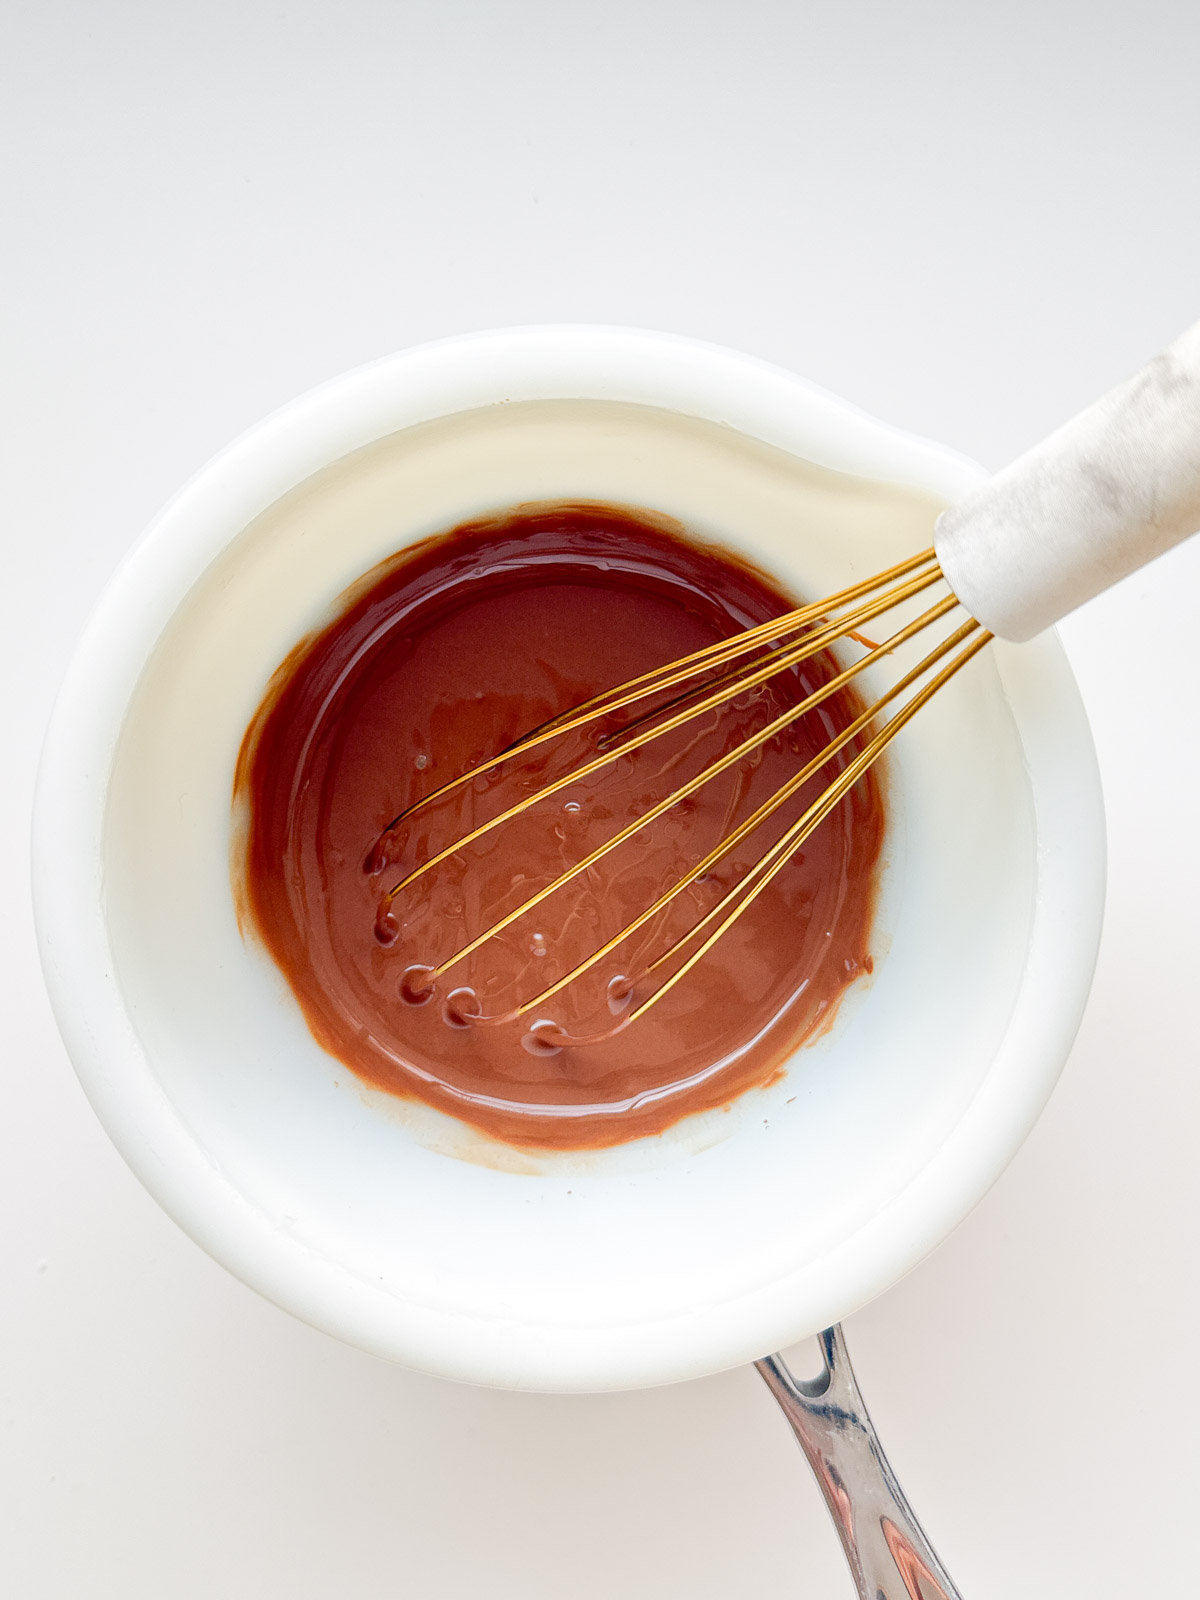
- Prepare the melted chocolate mixture. Set up your bain-marie - find a small to medium sized heatproof glass or ceramic bowl that will fit snugly on top of a small to medium sized pot without touching the water below. Add a few cups of water into the pan, and put the bowl back on top.
- Place the chocolate and coconut oil into the bowl on top of your bain-marie. Put the pan onto the stove on medium low heat until the water inside comes to a simmer, but turn the heat down if steam escapes - any steam or water touching your chocolate may cause it to seize. Heat until the chocolate and oil are melted and stir thoroughly. Turn off the heat and leave the melted chocolate mixture aside until the base layers are ready.
- Pit the dates and spread them open, and then press each date down into the dish, side by side, with the sticky interior side of the dates facing down. Continue until the entire dish surface is covered. If you have gaps between the dates, take one date, cut it into smaller pieces, and patch up the holes.
- Cover the date layer with another piece of parchment paper, and use a measuring cup or the bottom of a heavy glass to press down and further flatten and even out the date layer. Use the parchment paper to lift the date layer out of the dish, and then flip the date layer over, so that it is now sticky side up. Peel off the top layer of parchment paper and put the date layer back into the dish so that just the top sticky layer is visible.
- Spread on the peanut butter in an even layer using an offset spatula or other flat kitchen tool, and sprinkle on the crushed peanuts and sea salt. Pour the melted chocolate mixture on top as the final layer, and spread evenly until the entire surface is coated. If you love extra salt, you can always add some additional sea salt flakes onto the top chocolate layer as well.
- Place the pan into the fridge for 1-2 hours until the chocolate has fully set. Using a sharp knife, score the surface of the slab into the shapes you wish to cut, then cut out the individual bars. Store in the fridge, and enjoy!


Michelle says
I had to "quality control" test these a few times... just to be sure... before I knew it a fifth of the pan was gone, but now I'm certain, these are amazing! 😉
daraeats says
I'm glad that the result passed the quality control test! LOL Thanks so much for making the effort to try the recipe and write a review, and so glad you enjoyed the result!